Transaction
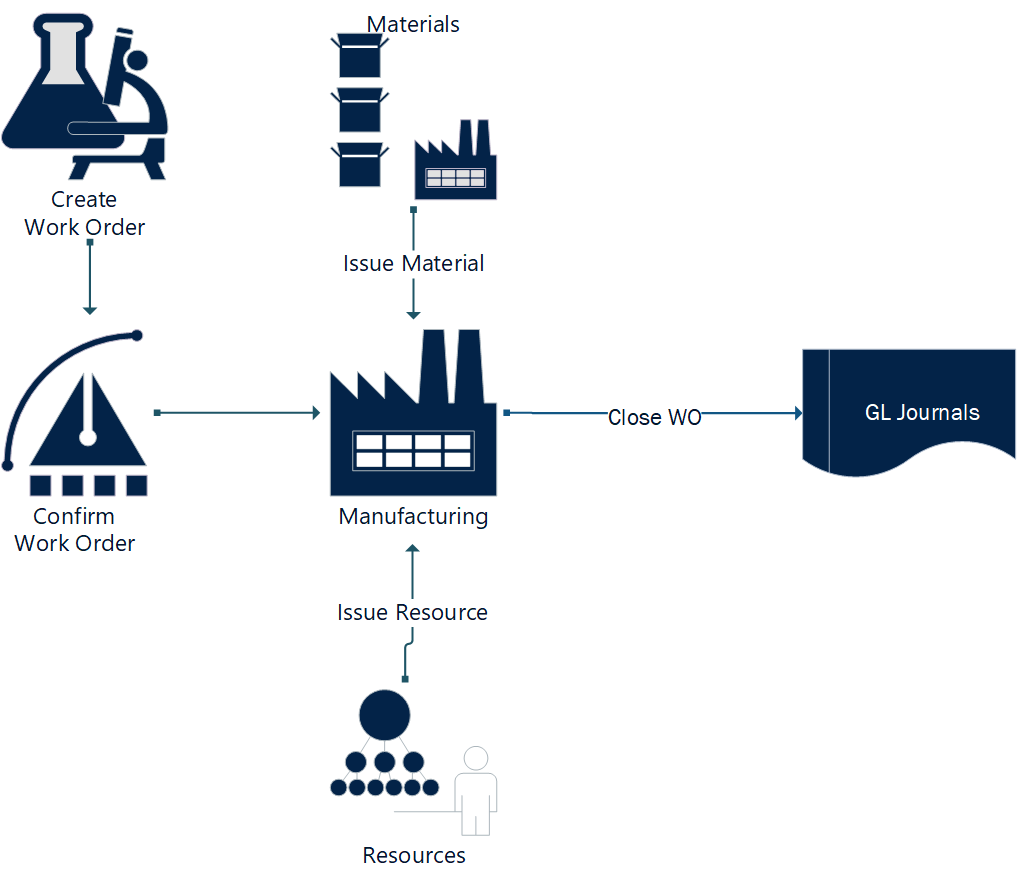
Completing a maintenance order of a product requires components and resources that are specified by a work definition. Thus, you must specify a work definition for each maintenance order. The system defaults the work definition from the asset instance. However, if required, you can manually update/delete/add materials and resources on a maintenance order.
inoERP provides several seeded maintenance transactions to map and track the physical activities in the system. You can also define your own transaction types, journal profiles, and accounting profiles to map any unique process that is not industry standard.
To correct any wrong transaction, create a reversal transaction ex: WIP Material Return, to rectify erroneous WIP Material Issue transactions.
You can create all maintenance transactions in 2 different ways
- Using the transaction document
- Using the screen/form available for each maintenance transaction
In the maintenance area, the application provides several different transactions. Using a transaction document, you can create below maintenance transactions
- WIP_MATERIAL_ISSUE
- WIP_MATERIAL_RETURN
- WIP_NEGATIVE_ISSUE
- WIP_NEGATIVE_RETURN
- INV_MOVE_TRANSACTION
The maintenance transactions are the same as the manufacturing transactions. The only difference is that several transactions, such as Completion and Return, are not allowed for a maintenance order.
Transaction Document
A transaction document consists of
- a header
- several lines that contain item and quantity information
- serial details for serial controlled items
- lot number details for lot controlled items
To create/view/update a receipt transaction doc, navigate to the "transaction doc" screen from your dashboard/favorite.
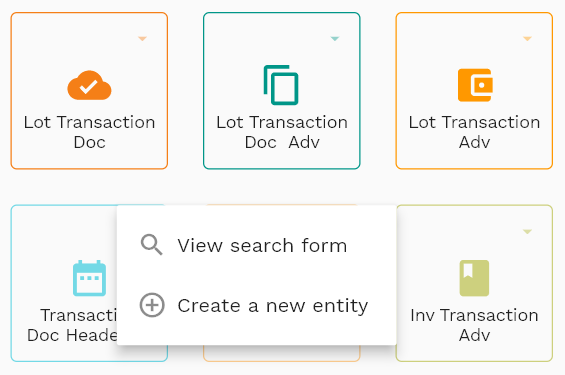
Enter the organization/transaction doc details or other criteria in the search form and click on the search button to view an existing transaction doc.
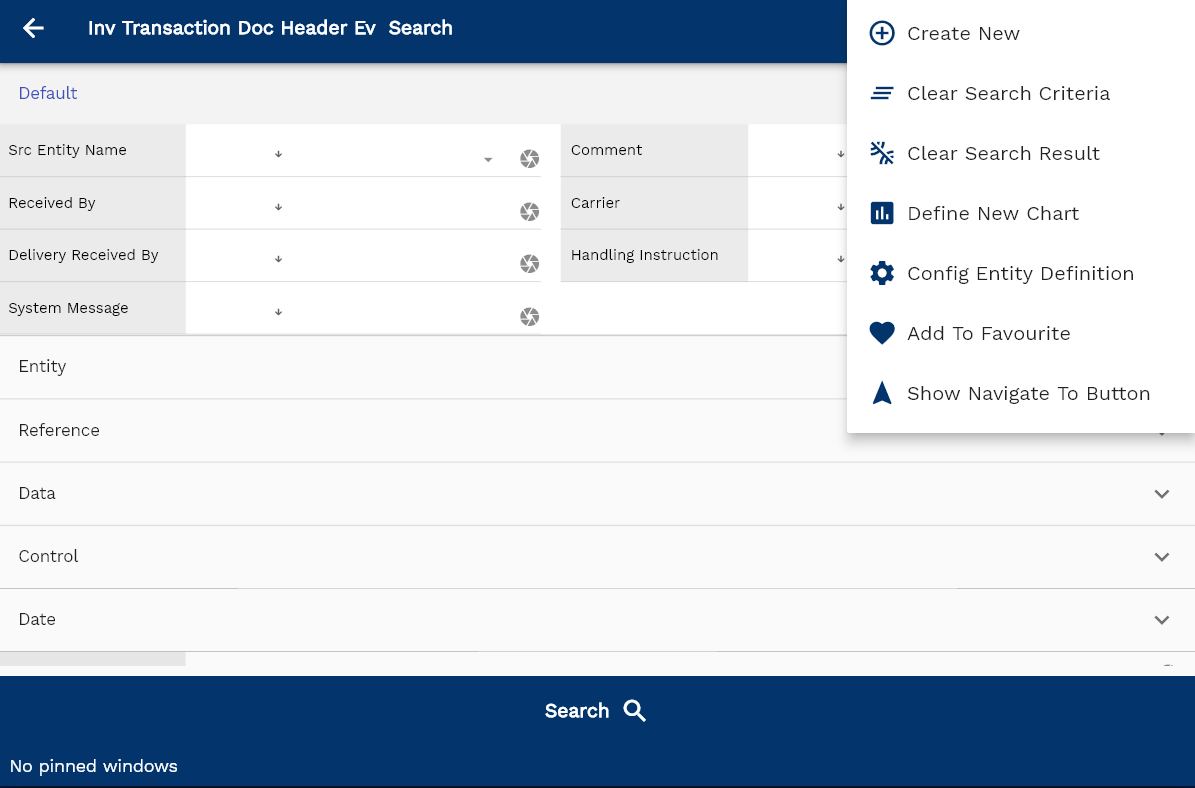
The system will show you all the transaction docs if you don't enter organization details. If your organization configures any field mandatory for search, you must enter those fields to search transaction docs.
The application will fetch all the server data and take you to the search result screen. The search result screen looks a bit different on desktop and mobile devices.
To view the search result in a table format, click on the table icon in the bottom left corner.
To view specific transaction doc details, click on the menu of that record, and click on view/fetch & view.
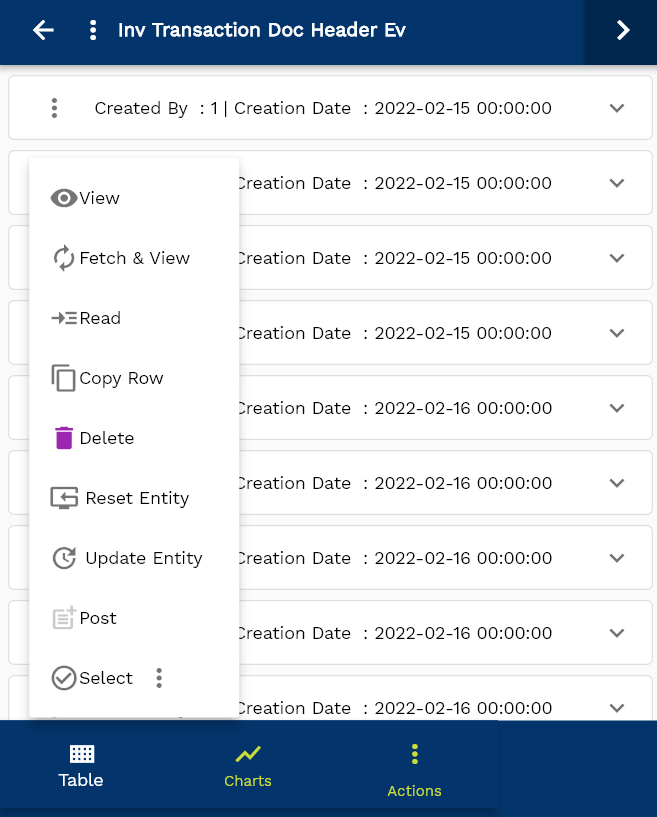
You can also click the expand icon against any item on the search result screen to view the transaction doc header details, such as number, quantities, start date, status, etc.
If you click on the create a new button, the system will open a simple step form to create a new transaction doc. You can click on the detail right bottom to view all the fields available for the object.

Document Type Select the document type as work order
Transaction Type Select one of the available maintenance transaction types

Scroll left, right, up, and down to view all the details. The document line and components are shown in a separate tab. The default configuration shows fields in various functional groups, such as
- Finance
- Entity
- Reference
- Data
- Control
- Etc

You can configure the application to show which fields should be shown under which group. You can also create new groups as per your business requirements.
Work Order
Select a work order number in the document header screen. It's an optional field. However, if you enter a value on the work order field, the app will fetch all the available lines and show them in the "Inv Transaction New Line" tab. If you don't enter any work order, you must manually add all the work order lines you want to ship in the "Inv Transaction Doc Line" tab.
All Fields
| Sequence | Name | Label | InputType | Field Group |
|---|---|---|---|---|
| 10 | sdtransaction docHeaderId | Sd transaction doc Header Id | InputType.number | REFERENCE |
| 10 | invOrgId | Inv Org Id | deferredSelect | REFERENCE |
| 20 | sdSoHeaderId | Sd So Header Id | InputType.number | REFERENCE |
| 30 | srcEntityName | Src Entity Name | deferredSelect | DEFAULT |
| 40 | srcEntityId | Src Entity Id | InputType.textField | REFERENCE |
| 50 | docNumber | Doc Number | InputType.textField | DATA |
| 60 | transaction docNumber | transaction doc Number | InputType.textField | DATA |
| 70 | comment | Comment | InputType.textField | DEFAULT |
| 80 | transactionTypeId | Transaction Type Id | InputType.number | CONTROL |
| 90 | transaction docDate | transaction doc Date | InputType.dateTime | DATE |
| 100 | docStatus | Doc Status | InputType.select | CONTROL |
| 110 | docStatus | Doc Status | InputType.select | CONTROL |
| 120 | receivedBy | Received By | InputType.textField | DEFAULT |
| 130 | carrier | Carrier | InputType.textField | DEFAULT |
| 140 | vehicleNumber | Vehicle Number | InputType.textField | DATA |
| 150 | transaction docReceivedBy | transaction doc Received By | InputType.textField | DEFAULT |
| 160 | carrierReceiptNumber | Carrier Receipt Number | InputType.textField | DATA |
| 170 | expetcedtransaction docDate | Expetced transaction doc Date | InputType.date | DATE |
| 180 | actualtransaction docDate | Actual transaction doc Date | InputType.date | DATE |
| 190 | handlingInstruction | Handling Instruction | InputType.textField | DEFAULT |
| 200 | systemMessage | System Message | InputType.textField | DEFAULT |
| 5210 | createdBy | Created By | InputType.textField | REFERENCE |
| 5220 | creationDate | Creation Date | InputType.dateTime | REFERENCE |
| 5230 | lastUpdatedBy | Last Updated By | InputType.textField | REFERENCE |
| 5240 | lastUpdateDate | Last Update Date | InputType.dateTime | REFERENCE |
Doc Lines
The document lines tab shows all the lines that are already assigned to the document header. When you confirm and create a transaction for the document, the system will use all the information on this tab to generate inventory transactions. You can also manually add a new line to the document in this tab.
If you want to default all the work order information, use the "Inv Transaction New Line" tab to add new lines to the document header. Use this tab (Doc lines) only for review/update.

You can add multiple lines to each transaction doc header. Each transaction doc line contains an item, UOM, product description, quantity, serial, and lot details.
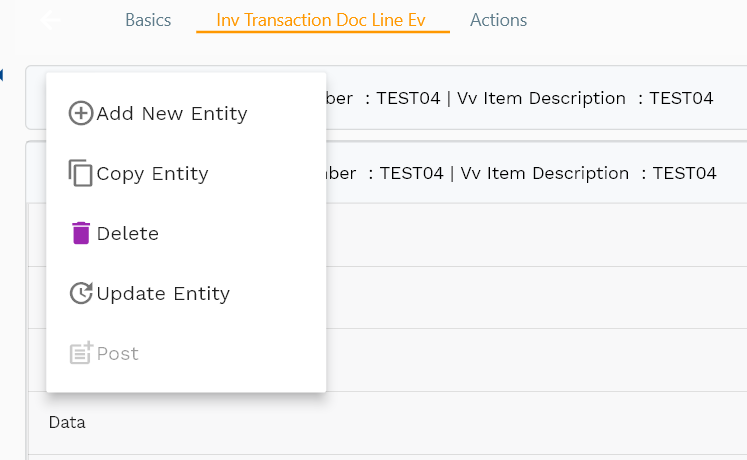
Navigate to the lines tab to view/add/update lines.
Click on the add new entity to add a new line. If a line exists, click on copy entity to copy all the details.
You can enable/disable fields allowed to be copied in the menu configuration.
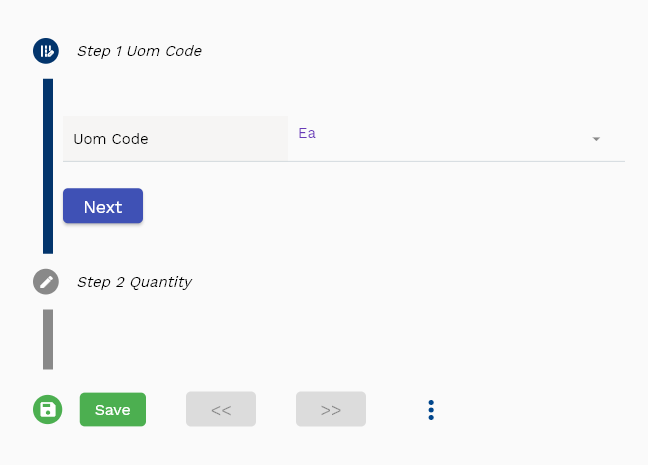
Quantity: Enter the Quantity to be transacted against the doc line.
Line Number: Enter a document line number.
Item: Enter an item number.

Transaction Type: A read-only field, the value defaults from the transaction type selected on the document header
Document Status: A read-only field that shows the current status of the document line. You can change the document status using the actions available on the "Actions" tab. Only lines in "validated" status are used for the inventory transaction. When the system creates a transaction against a document line, the line's status is changed to closed.
The entity group shows information related to shipping inventory organization.
The reference groups show various ids for reference only. You don't need to enter any information in this section. When you save a transaction doc for the first time, the system will auto-populate the newly created header id and line ids.
Scroll left, right, up, and down view all other fields.

Enter all the other fields and click on the save button to save the transaction doc. The app will post all the data to the server and will show the messages returned from the server.

All Fields
| Sequence | Name | Label | InputType | Field Group |
|---|---|---|---|---|
| 10 | vvSoNumber | So Number | InputType.textField | DATA |
| 10 | vvSoDocNumber | So Doc Number | InputType.textField | DATA |
| 20 | vvOrgCode | Org Code | deferredSelect | ENTITY |
| 30 | vvItemNumber | Item Number | deferredSelect | DEFAULT |
| 40 | vvUomCode | Uom Code | deferredSelect | DEFAULT |
| 50 | vvUomDescription | Uom Description | deferredSelect | DEFAULT |
| 60 | vvItemStatus | Item Status | deferredSelect | CONTROL |
| 70 | vvSdSoHeaderId | Sd So Header Id | InputType.number | REFERENCE |
| 80 | vvLineNumber | Line Number | InputType.number | DATA |
| 90 | vvInvOrgId | Inv Org Id | deferredSelect | REFERENCE |
| 100 | vvInvItemMasterId | Inv Item Master Id | deferredSelect | REFERENCE |
| 110 | vvItemDescription | Item Description | deferredSelect | DEFAULT |
| 120 | vvLineQuantity | Line Quantity | InputType.textField | DATA |
| 130 | vvShipmentNumber | Shipment Number | InputType.number | DATA |
| 140 | vvSubInventory | Sub Inventory | deferredSelect | ENTITY |
| 150 | vvLocatorId | Locator Id | deferredSelect | REFERENCE |
| 160 | vvDetailLocator | Detail Locator | deferredSelect | ENTITY |
| 170 | vvQuantity | Quantity | InputType.textField | DATA |
| 180 | sdtransaction docLineId | Sd transaction doc Line Id | InputType.number | REFERENCE |
| 190 | sdtransaction docHeaderId | Sd transaction doc Header Id | InputType.number | REFERENCE |
| 200 | sdSoLineId | Sd So Line Id | InputType.textField | REFERENCE |
| 210 | sdSoDetailId | Sd So Detail Id | InputType.number | REFERENCE |
| 220 | transaction docLineNumber | transaction doc Line Number | InputType.number | DATA |
| 230 | srcEntityName | Src Entity Name | deferredSelect | DEFAULT |
| 240 | srcEntityId | Src Entity Id | InputType.textField | REFERENCE |
| 250 | transaction docQuantity | transaction doc Quantity | InputType.textField | DATA |
| 260 | subInventory | Sub Inventory | deferredSelect | ENTITY |
| 270 | locatorId | Locator Id | deferredSelect | REFERENCE |
| 280 | docStatus | Doc Status | InputType.select | CONTROL |
| 290 | pickingDate | Picking Date | InputType.date | DATE |
| 300 | actualShipDate | Actual Ship Date | InputType.date | DATE |
| 310 | referenceDocType | Reference Doc Type | InputType.number | CONTROL |
| 320 | referenceDocNumber | Reference Doc Number | InputType.number | DATA |
| 330 | shipToLocationId | Ship To Location Id | InputType.number | REFERENCE |
| 340 | uomCode | Uom Code | deferredSelect | DEFAULT |
| 350 | volumeUomCode | Volume Uom Code | deferredSelect | DEFAULT |
| 360 | totalVolume | Total Volume | InputType.textField | DATA |
| 370 | weightUomCode | Weight Uom Code | deferredSelect | DEFAULT |
| 380 | totalWeight | Total Weight | InputType.date | DATA |
| 5390 | createdBy | Created By | InputType.textField | REFERENCE |
| 5400 | creationDate | Creation Date | InputType.dateTime | REFERENCE |
| 5410 | lastUpdatedBy | Last Updated By | InputType.textField | REFERENCE |
| 5420 | lastUpdateDate | Last Update Date | InputType.dateTime | REFERENCE |
New Lines

The new lines tab shows all the work order lines of the work order selected in the document header tab. The information in the "new lines" tab is not associated with the document header. This tab is used to simplify the data entry and allows users to create document lines without manually entering all the line details. The system adds new document lines to the transaction header when the document is saved. You can refresh the document line tab to view the newly added lines. All the new lines are shown with quantity zero; you can enter a quantity and click on the save button to save the document.

All the information in the new lines tab is the same as the "Document Line Tab ."The only difference is the lines are defaulted from work orders and are not related to the document header.
Navigate to the lines tab to view/add/update lines.
Click on the add new entity to add a new line. If a line exists, click on copy entity to copy all the details.
You can enable/disable fields allowed to be copied in the menu configuration.

Quantity: Enter the Quantity to be transacted against the doc line.
Line Number: Enter a document line number.
Item: Enter an item number.

Scroll left, right, up, and down view all other fields.
Enter all the other fields and click on the save button to save the transaction doc. The app will post all the data to the server and will show the messages returned from the server.
All Fields
| Sequence | Name | Label | InputType | Field Group |
|---|---|---|---|---|
| 10 | vvSoNumber | So Number | InputType.textField | DATA |
| 10 | vvSoDocNumber | So Doc Number | InputType.textField | DATA |
| 20 | vvOrgCode | Org Code | deferredSelect | ENTITY |
| 30 | vvItemNumber | Item Number | deferredSelect | DEFAULT |
| 40 | vvUomCode | Uom Code | deferredSelect | DEFAULT |
| 50 | vvUomDescription | Uom Description | deferredSelect | DEFAULT |
| 60 | vvItemStatus | Item Status | deferredSelect | CONTROL |
| 70 | vvSdSoHeaderId | Sd So Header Id | InputType.number | REFERENCE |
| 80 | vvLineNumber | Line Number | InputType.number | DATA |
| 90 | vvInvOrgId | Inv Org Id | deferredSelect | REFERENCE |
| 100 | vvInvItemMasterId | Inv Item Master Id | deferredSelect | REFERENCE |
| 110 | vvItemDescription | Item Description | deferredSelect | DEFAULT |
| 120 | vvLineQuantity | Line Quantity | InputType.textField | DATA |
| 130 | vvShipmentNumber | Shipment Number | InputType.number | DATA |
| 140 | vvSubInventory | Sub Inventory | deferredSelect | ENTITY |
| 150 | vvLocatorId | Locator Id | deferredSelect | REFERENCE |
| 160 | vvDetailLocator | Detail Locator | deferredSelect | ENTITY |
| 170 | vvQuantity | Quantity | InputType.textField | DATA |
| 180 | sdtransaction docLineId | Sd transaction doc Line Id | InputType.number | REFERENCE |
| 190 | sdtransaction docHeaderId | Sd transaction doc Header Id | InputType.number | REFERENCE |
| 200 | sdSoLineId | Sd So Line Id | InputType.textField | REFERENCE |
| 210 | sdSoDetailId | Sd So Detail Id | InputType.number | REFERENCE |
| 220 | transaction docLineNumber | transaction doc Line Number | InputType.number | DATA |
| 230 | srcEntityName | Src Entity Name | deferredSelect | DEFAULT |
| 240 | srcEntityId | Src Entity Id | InputType.textField | REFERENCE |
| 250 | transaction docQuantity | transaction doc Quantity | InputType.textField | DATA |
| 260 | subInventory | Sub Inventory | deferredSelect | ENTITY |
| 270 | locatorId | Locator Id | deferredSelect | REFERENCE |
| 280 | docStatus | Doc Status | InputType.select | CONTROL |
| 290 | pickingDate | Picking Date | InputType.date | DATE |
| 300 | actualShipDate | Actual Ship Date | InputType.date | DATE |
| 310 | referenceDocType | Reference Doc Type | InputType.number | CONTROL |
| 320 | referenceDocNumber | Reference Doc Number | InputType.number | DATA |
| 330 | shipToLocationId | Ship To Location Id | InputType.number | REFERENCE |
| 340 | uomCode | Uom Code | deferredSelect | DEFAULT |
| 350 | volumeUomCode | Volume Uom Code | deferredSelect | DEFAULT |
| 360 | totalVolume | Total Volume | InputType.textField | DATA |
| 370 | weightUomCode | Weight Uom Code | deferredSelect | DEFAULT |
| 380 | totalWeight | Total Weight | InputType.date | DATA |
| 5390 | createdBy | Created By | InputType.textField | REFERENCE |
| 5400 | creationDate | Creation Date | InputType.dateTime | REFERENCE |
| 5410 | lastUpdatedBy | Last Updated By | InputType.textField | REFERENCE |
| 5420 | lastUpdateDate | Last Update Date | InputType.dateTime | REFERENCE |
Actions
Actions allow you to change the status of the transaction doc. The system creates a transaction doc in draft status. If you are using custom approval or requesting someone else to complete the Transaction, click on the confirm button to confirm that the document is ready for a transaction. Confirmation is an optional step. You can directly create inventory transactions from draft status.
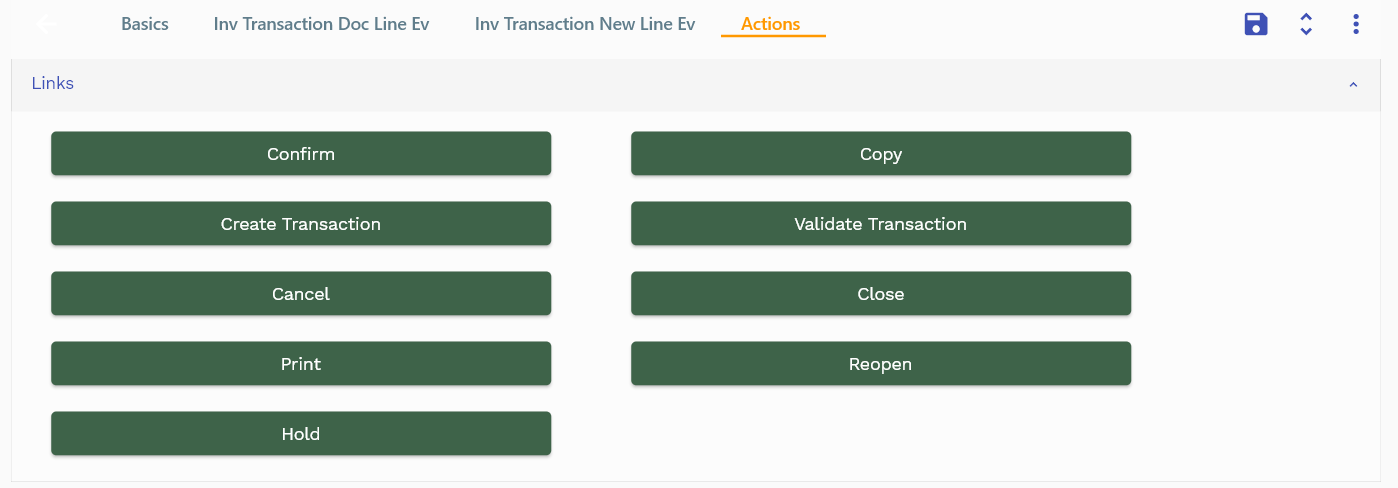
Usage of various button
Confirm
If the person entering a transaction document is different from the person who physically completes the task, then the document entering person can create and confirm the document. The person who completes the physical task can complete the Transaction.
Validate
All transaction documents must be validated before the system can use them for inventory transactions. The validation process checks the document details and confirms several checks - such as enough stock is available to create an inventory transaction, etc.
You can create your custom validation using javascript.
Transaction
The system uses the transaction document information to create inventory transactions. This process results in stock change and later allows you to generate GL journals against inventory transactions.
You can cancel a transaction doc by clicking on the Cancel button. Similarly, you can close any transaction doc by clicking on the Close button.
Click on the Create Transaction button to create inventory transactions. Create transaction process creates below transactions
- Inventory transaction
- Inventory serial Transaction for serial numbers entered on transaction doc lines
- Inventory lot transaction for lot numbers entered on transaction doc lines
You can create only one inventory transaction against one transaction doc line.
Review
Inventory Transaction

After creating inventory transactions against an inventory transaction doc, you can review the inventory transactions in the inventory transaction screen. Navigate to the inventory transaction search screen and search with the transaction doc number, ID, or other criteria.
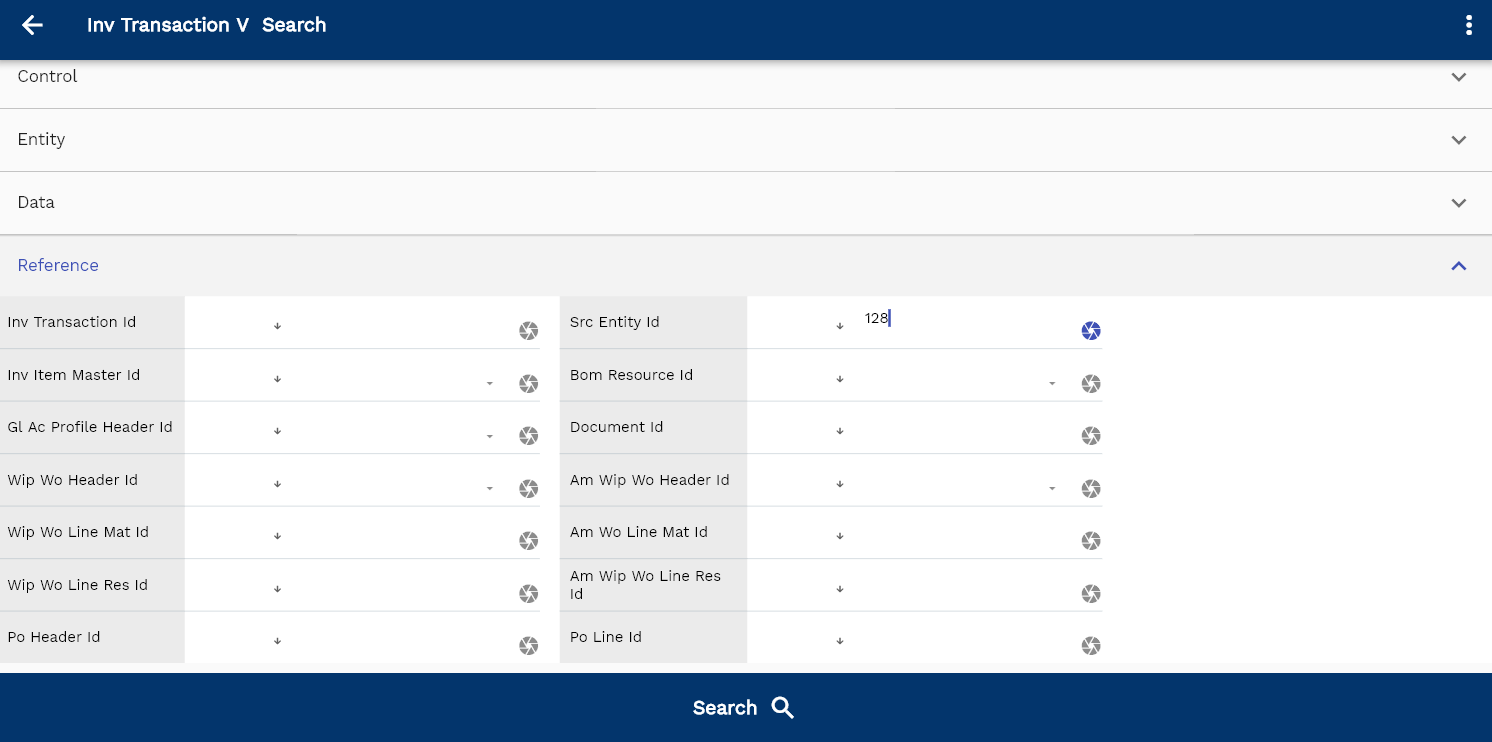
The system will show all the transactions created against a transaction document. The inventory transaction shows all the lines in the inventory transaction doc, and the system generates automatic lines created using inventory transaction doc lines. For certain transactions (such as Sub-Inventory Transfer and Inter-Org Transfer), the system might show more inventory transaction lines than the number of lines on the inventory transaction.

Transaction Doc
After creating inventory transactions against an inventory transaction doc, you can review the inventory transactions doc in the inventory transaction doc screen. Navigate to the "inventory transaction doc" search screen and search with the transaction doc number, ID, or other criteria. The system will show you the updated Transaction with closed status.

OnHand
After creating inventory transactions against an inventory transaction doc, you can review the inventory transactions doc in the inventory OnHand screen. Navigate to the inventory OnHand search screen and search the item number used in the inventory transaction doc. The system will show you the updated OnHand details.

Manufacturing Transactions
Use inventory transaction documents for inventory-related transactions: all the direct material transactions - Ex. Material Issue/Return, Resource Issue/Return, etc. - against a work order will be removed in future releases.
Material Issue
A component issue transaction maps & tracks physically used components/materials during maintenance processes. The transaction issues items from inventory to work orders to fulfill material requirements. Material issue reduces stock on hand and increases WIP valuation. You can use move transactions to issue materials to a work order automatically. You can set any component to be automatically consumed/ backflushed during move transaction by selecting the supply type to operation pull.
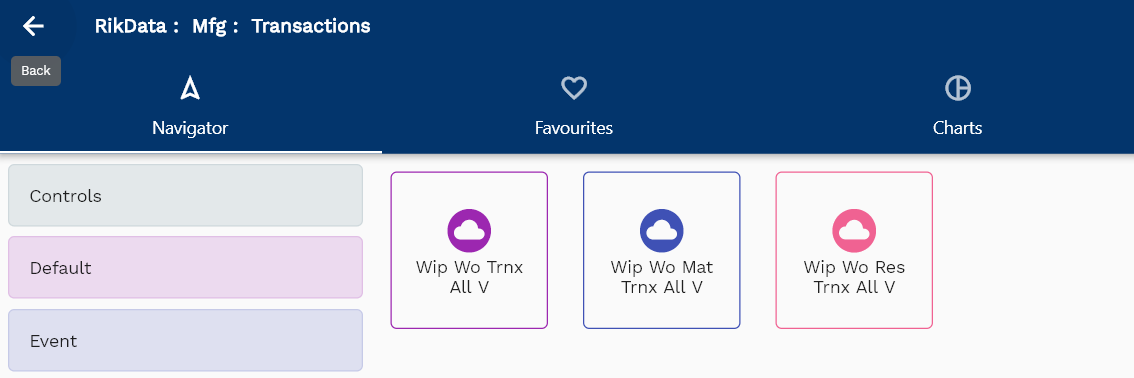
To issue material against a work order, navigate to the transaction search screen and then search the work order using the work order number or any other search criteria.

Click on the select icon next to the material you want to issue.
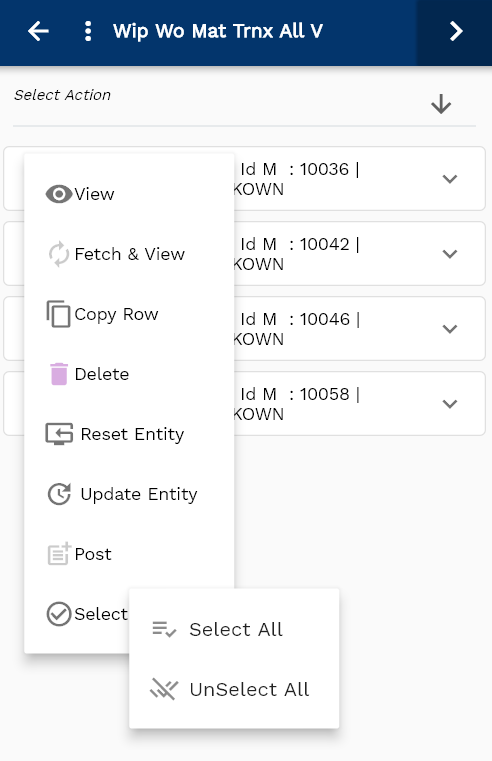
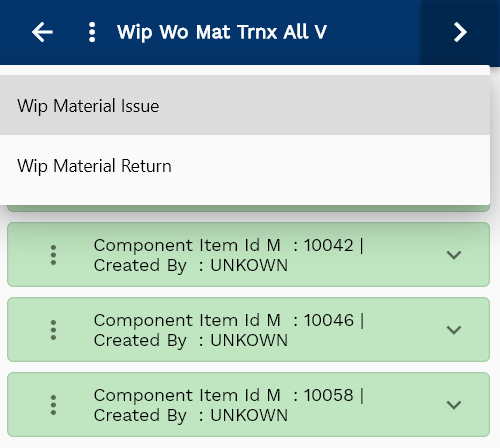
Select "WIP Material Issue" in the action list of values
The system will take you to the material transaction form and show you the details of all the items selected on the previous screen.
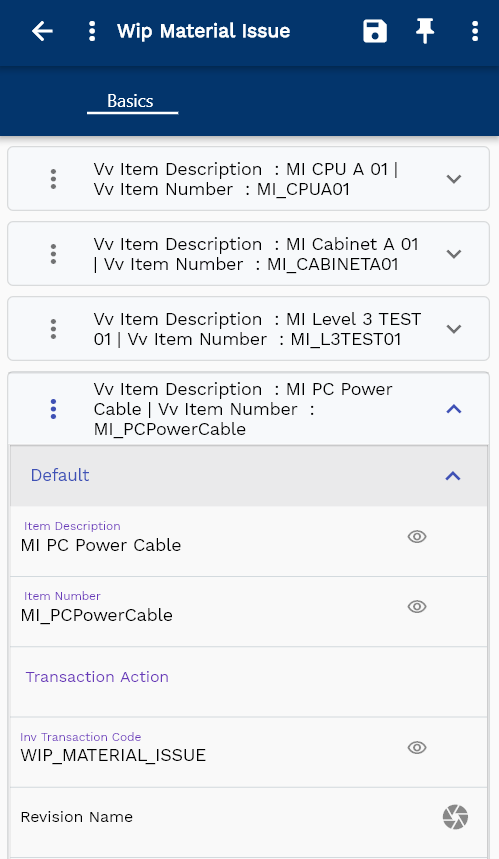
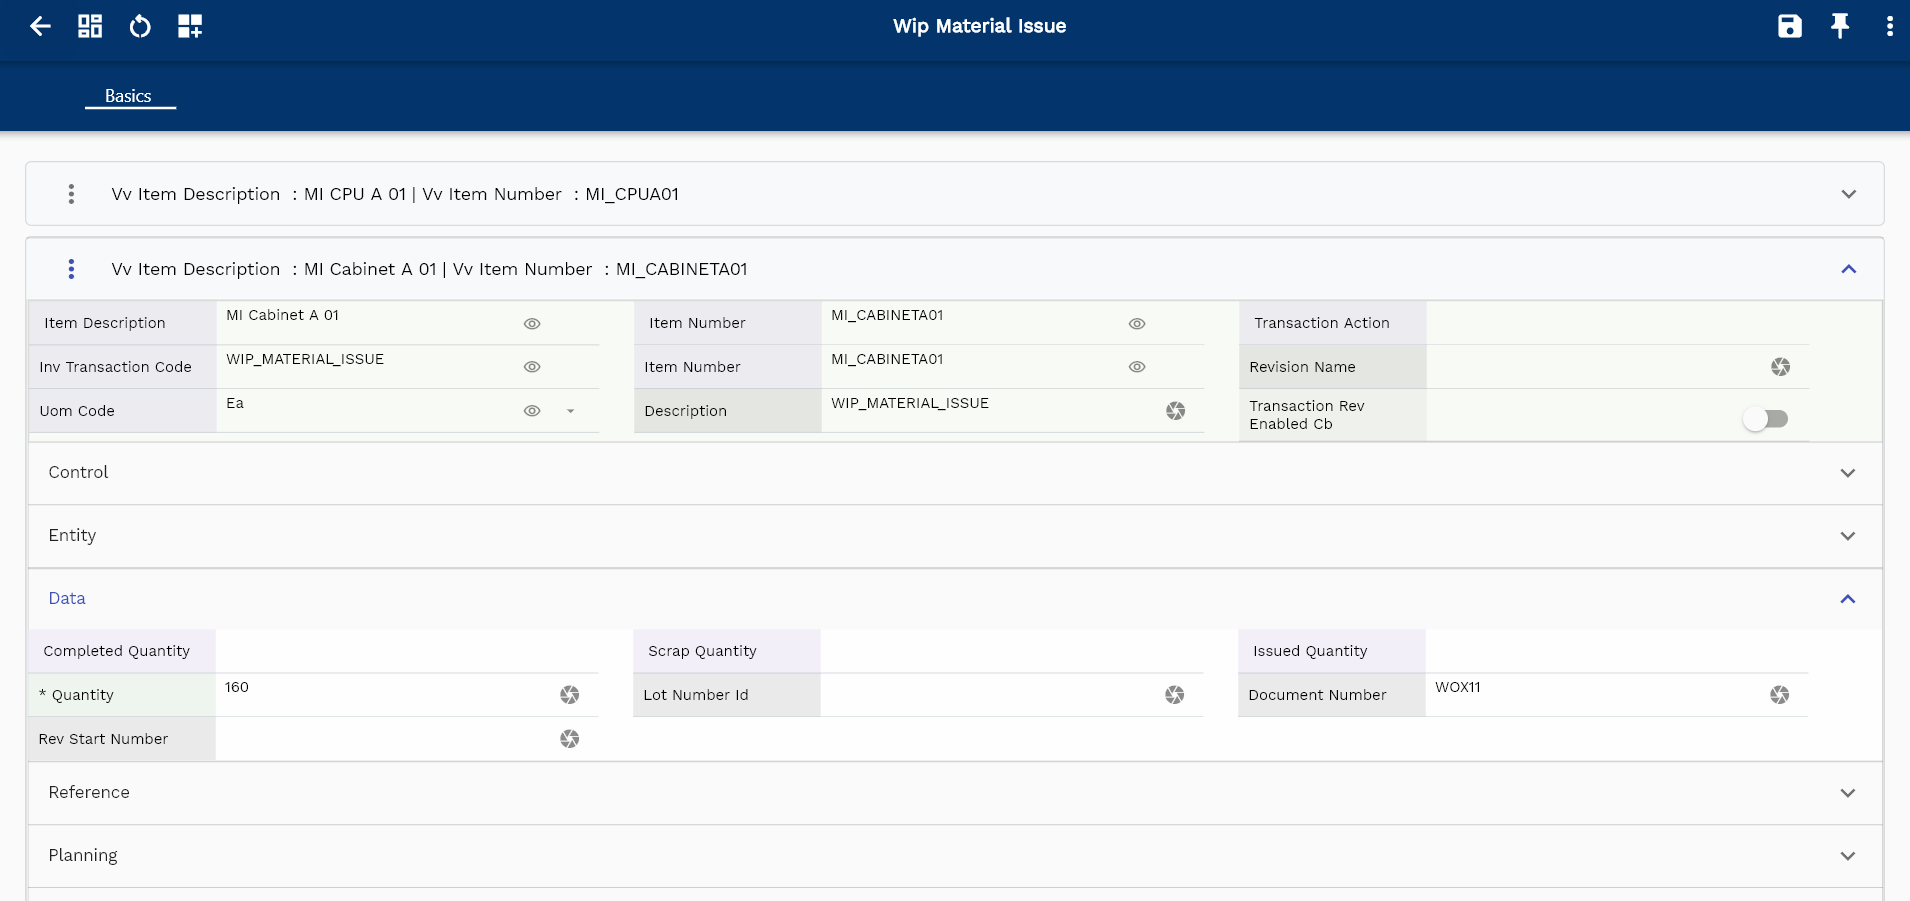
Click on the expand button to review the details of the material
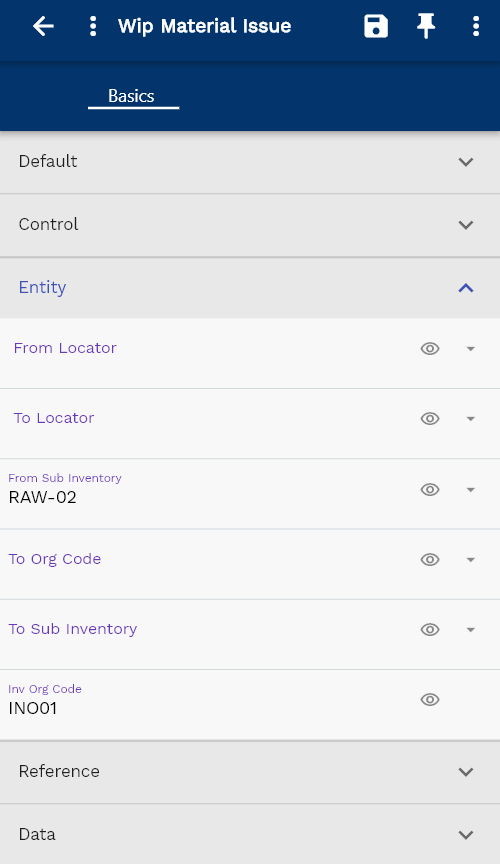
The transaction form rearranges itself depending upon the device screen.
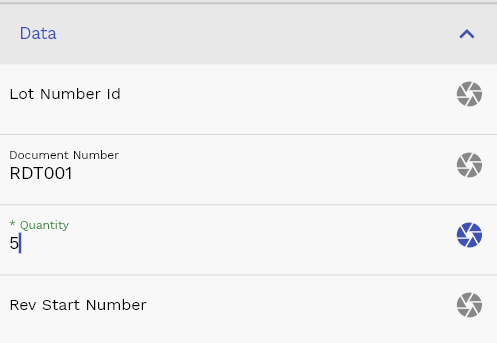
Enter the quantity you want to issue.
The system defaults the quantity field depending on the quantity required and the already issued quantity. However, it also allows you to override the value. You can allocate more/less quantity to a work order as per the actual usage of a component in a work order.
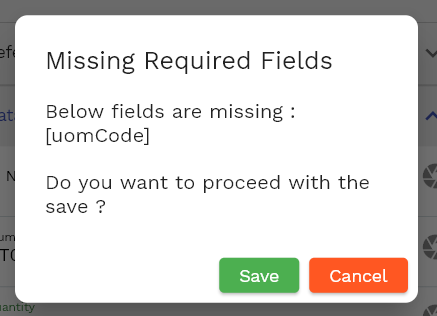
If you click the save button without entering all the mandatory fields, the system will show the below error message.
Enter all the other details, and click on the Save button to complete the material issue transaction.

You can review all the completed transactions in the transaction view screen.
Navigate to the transaction search form, enter the work order number or any other criteria to search the transaction
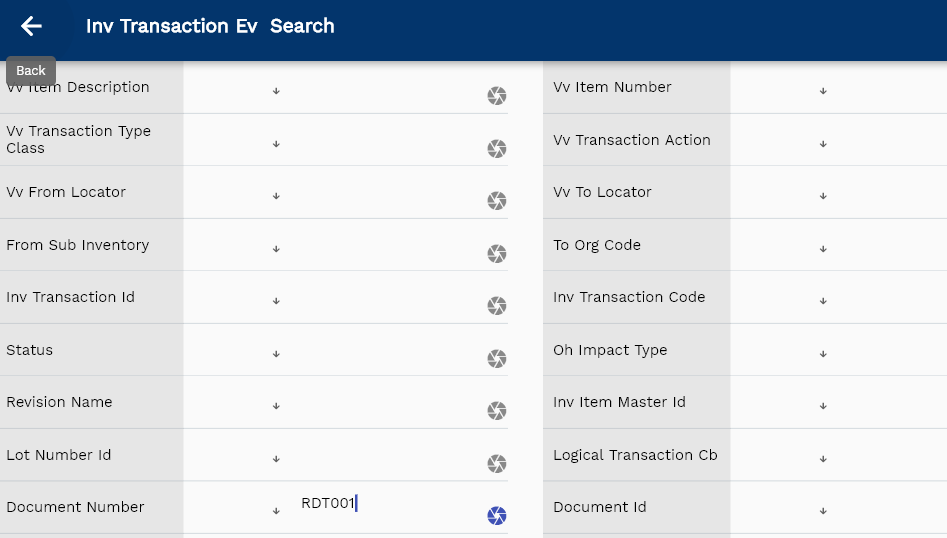
The system will show you the completed transaction.
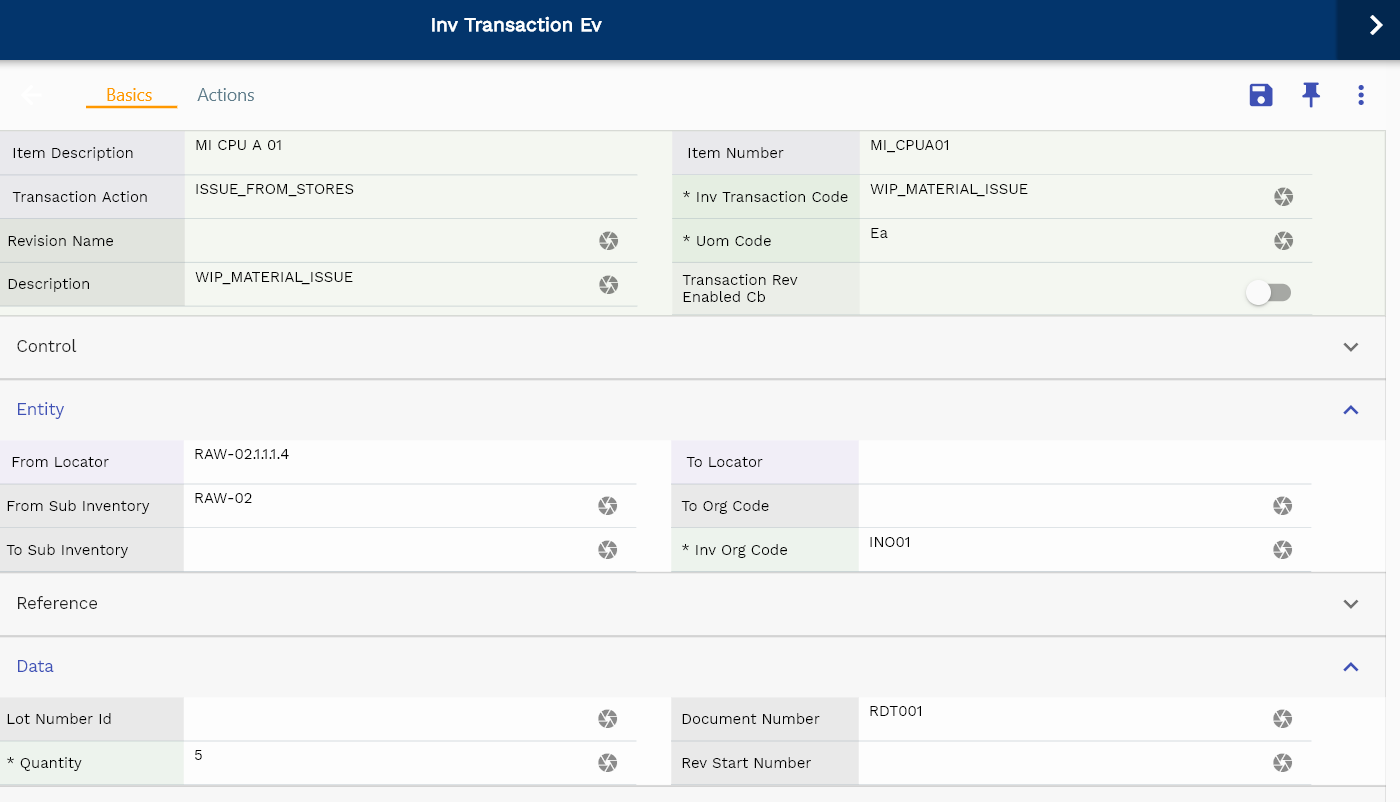
You can create journal entries for the transaction by navigating to the action tab. However, it's advisable to schedule the accounting program to run regularly.

Material Return
Material return is a reversal transaction for material issue transactions. You can use the transaction to correct any wrong material issue transaction.
Material return transaction returns items from work orders to inventory. Material return increases inventory on-hand and reduces WIP valuation.

To issue material against a work order, navigate to the transaction search screen and then search the work order using the work order number or any other search criteria.

Click on the select icon next to the material you want to return.

Select "WIP Material Return" in the action list of values

The system will take you to the material transaction form and show you the details of all the items selected on the previous screen.

Click on the expand button to review the details of the material

The transaction form rearranges itself depending upon the device screen.
Enter the quantity you want to return.
The system defaults the quantity field depending on the quantity required and the already issued quantity. However, it also allows you to override the value. You can allocate more/less quantity to a work order as per the actual usage of a component in a work order.

If you click the save button without entering all the mandatory fields, the system will show the below error message.

Enter all the other details, and click on the Save button to complete the material issue transaction.

You can review all the completed transactions in the transaction view screen.
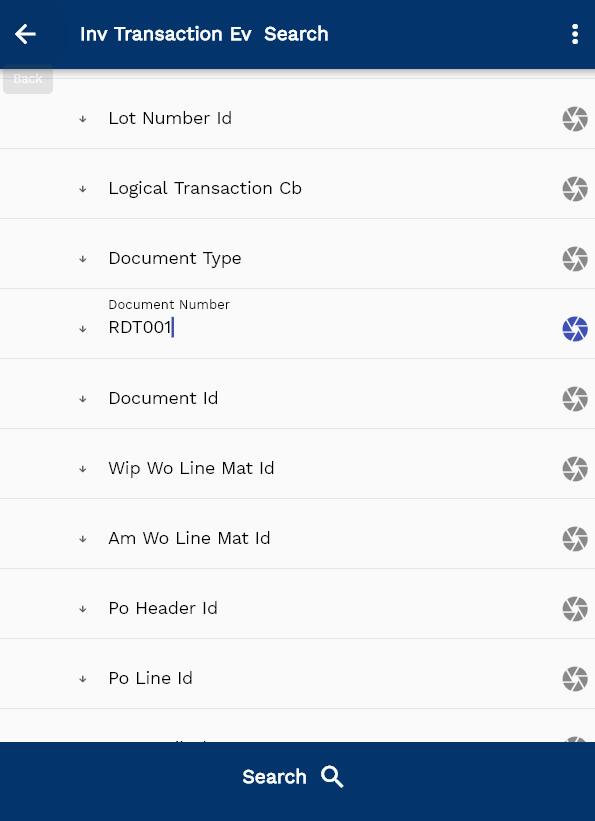
Navigate to the transaction search form, enter the work order number or any other criteria to search the transaction The system will show you the completed transaction.

You can create journal entries for the transaction by navigating to the action tab. However, it's advisable to schedule the accounting program to run regularly.

Resource Issue
You can use resource issue transactions to track resource usage/consumption in a work order. You can do resource transactions manually or automatically using move transactions. Resource issue increases WIP valuation, and you can set any resource to be auto-consumed during a move transaction by selecting the charge type to WIP_MOVE.
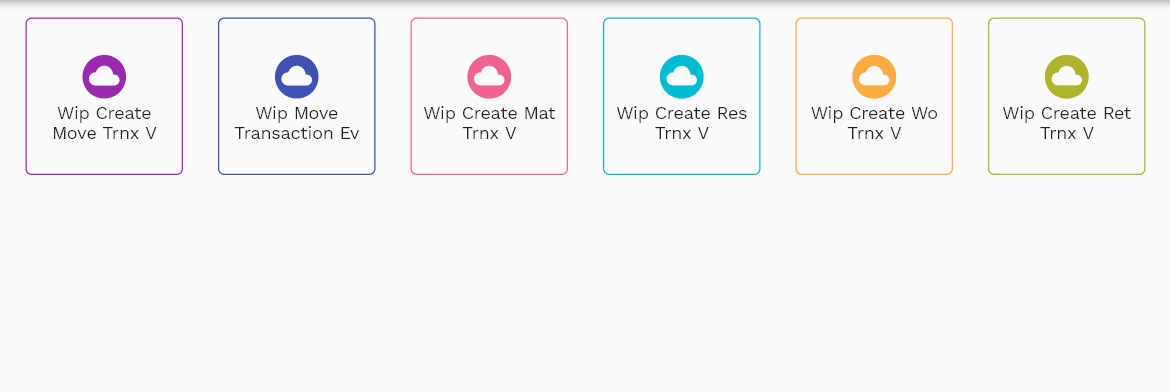
To issue a resource against a work order, navigate to the transaction search screen and then search the work order using the work order number or any other search criteria.
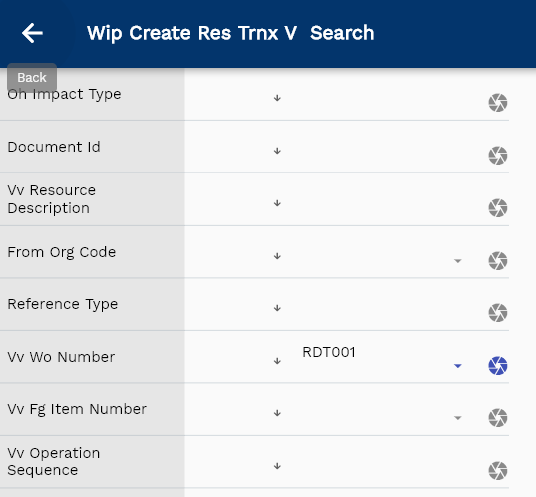
Click on the select icon next to the resource you want to issue.
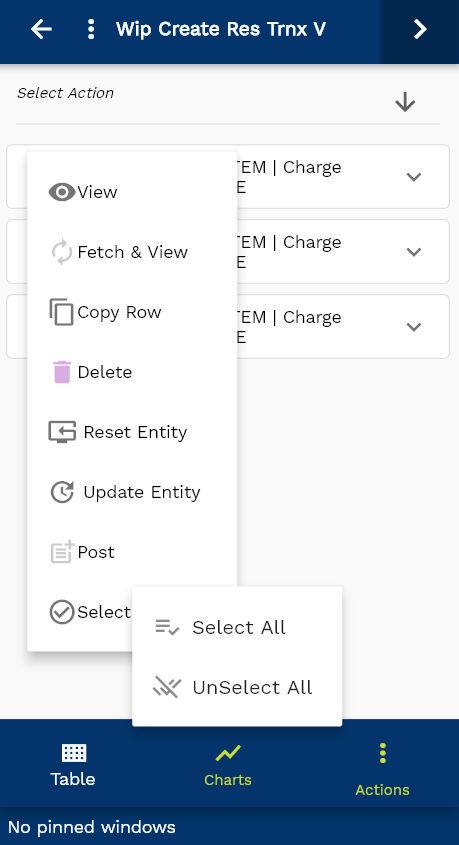
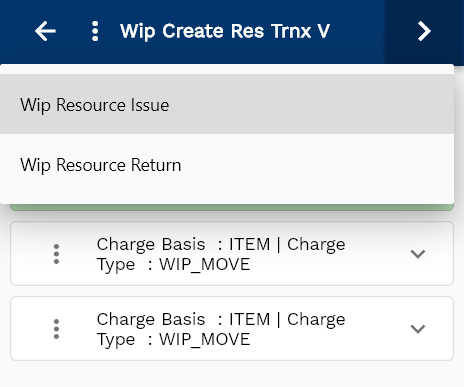
Select "WIP resource Issue" in the action list of values.
The system will take you to the resource transaction form and show you the details of all the items selected on the previous screen.
Click on the expand button to review the details of the resource.

The transaction form rearranges itself depending upon the device screen.
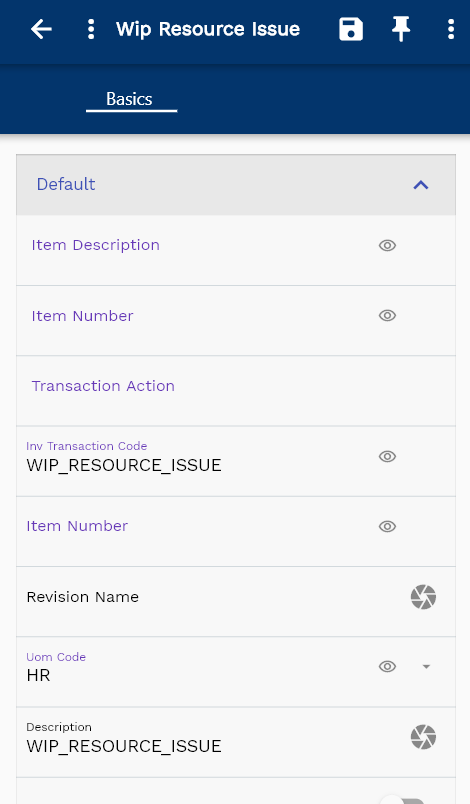
Enter the quantity you want to issue.
The system defaults the quantity field depending on the quantity required and the already issued quantity. However, it also allows you to override the value. You can allocate more/less quantity to a work order as per the actual usage of a resource in a work order.
If you click the save button without entering all the mandatory fields, the system will show the below error message.

Enter all the other details, and click on the Save button to complete the resource issue transaction.
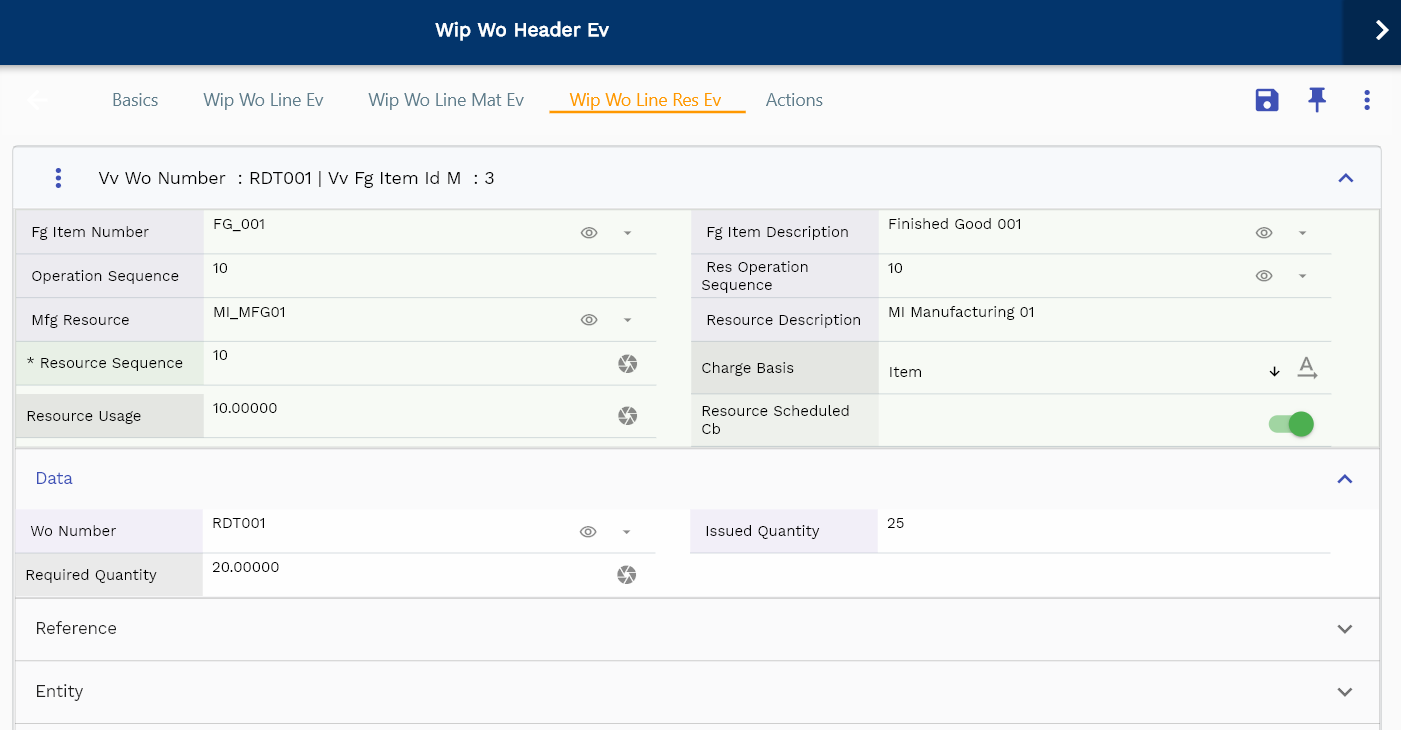
You can review all the completed transactions in the transaction view screen.
Navigate to the transaction search form, enter the work order number or any other criteria to search the transaction
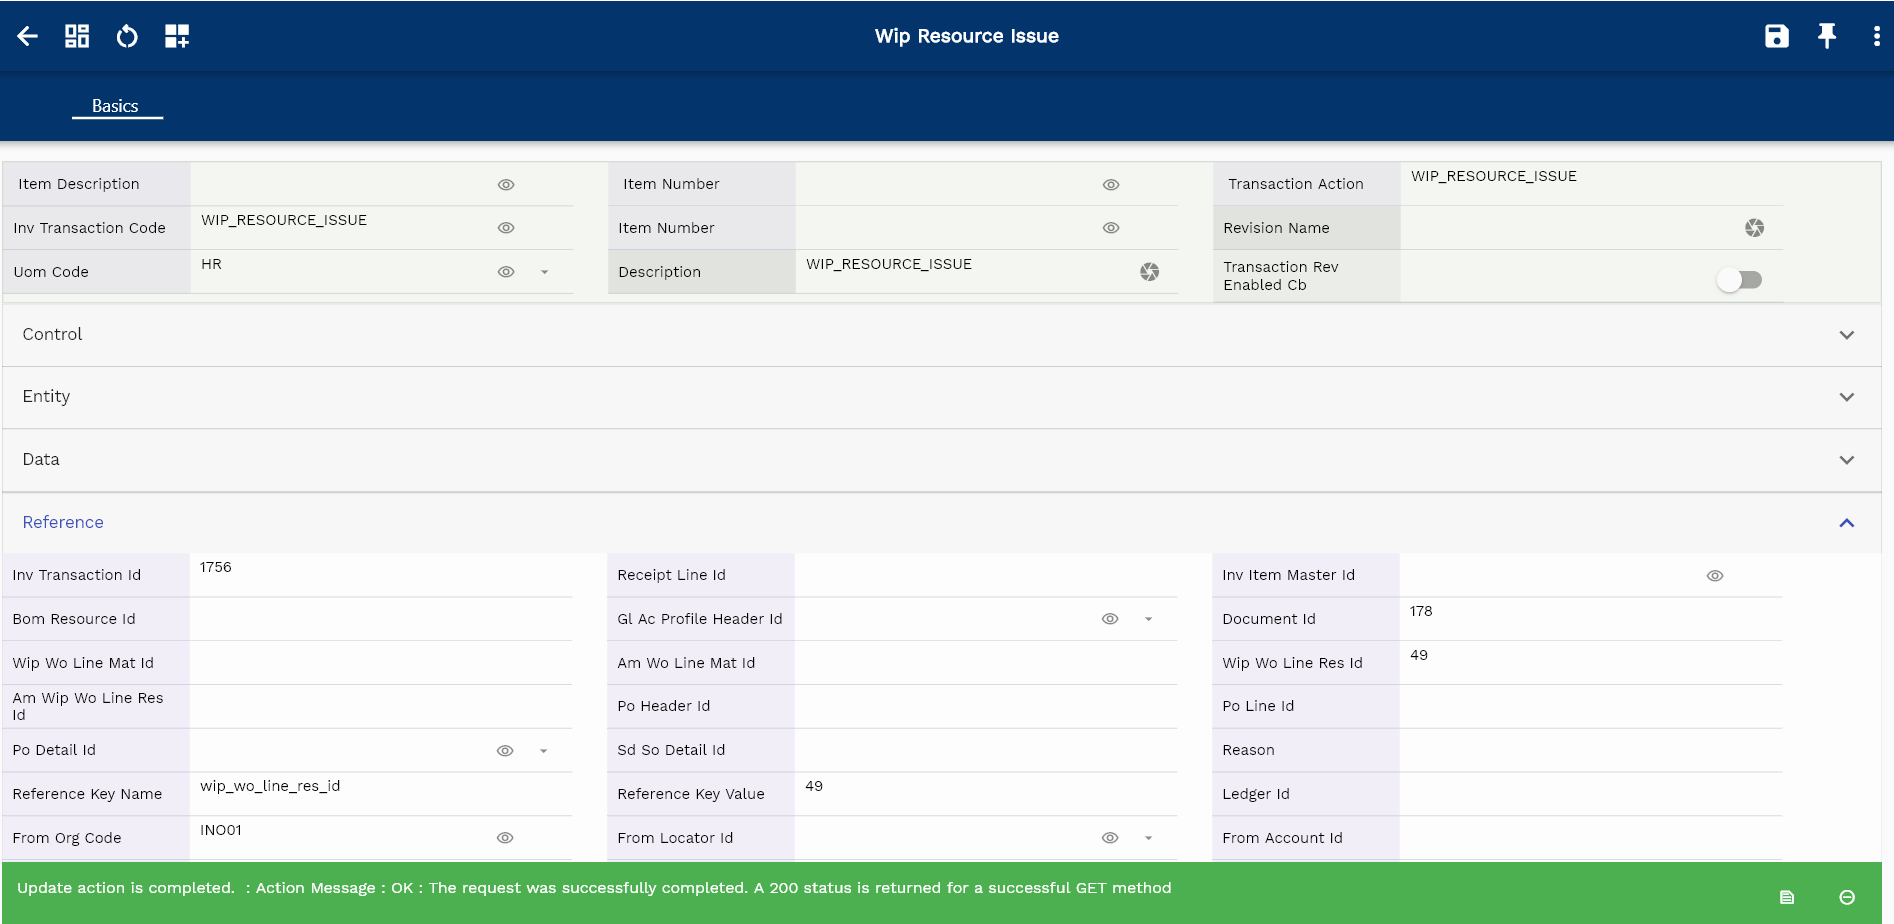
The system will show you the completed transaction.
You can create journal entries for the transaction by navigating to the action tab. However, it's advisable to schedule the accounting program to run regularly.

Resource Return
WIP Resource Return is a reversal transaction for the WIP Resource Issue. The system does not allow you to update any resource transaction. So, to correct any wrong WIP Resource Issue transaction, create a WIP resource return transaction.

To return a resource issued to a work order, navigate to the transaction search screen and then search the work order using the work order number or any other search criteria.

Click on the select icon next to the resource you want to return.

Select "WIP resource Return" in the action list of values

The system will take you to the resource transaction form and show you the details of all the items selected on the previous screen.

Click on the expand button to review the details of the resource.
The transaction form rearranges itself depending upon the device screen.

Enter the quantity you want to return.
The system defaults the quantity field depending on the quantity issued and the already returned quantity. However, it also allows you to override the value.

If you click the save button without entering all the mandatory fields, the system will show the below error message.

Enter all the other details, and click on the Save button to complete the resource return transaction. You can review all the completed transactions in the transaction view screen.

Navigate to the transaction search form and enter the work order number or other criteria to search the transaction.
The system will show you the completed transaction.
You can create journal entries for the transaction by navigating to the action tab. However, it's advisable to schedule the accounting program to run regularly.

Move Transaction
Move transaction is an optional transaction that you can incorporate into your business process to simplify and streamline the maintenance operation. Move transactions help businesses to track the exact status of a work order. It allows companies to track the completion percentage of a work order in each routing step.
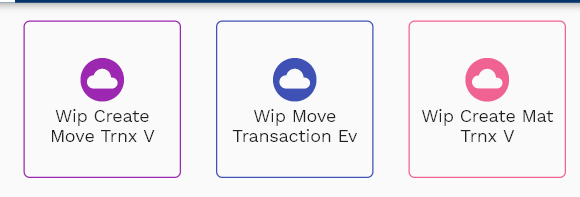
You can move the assemblies from one operation step to another operation step in the same operation or a different operation. The system allows you to move assemblies forward and backward within and between operations. You can backflush materials and automatically consume resources by moving material from a lower operation to a higher one. When you move from a higher operation to a lower operation, the system automatically reverses the material and resource consumption.
To create a move transaction a work order, navigate to the transaction search screen and then search the work order using the work order number or any other search criteria.

Click on the select icon next to the operation you want to transact.
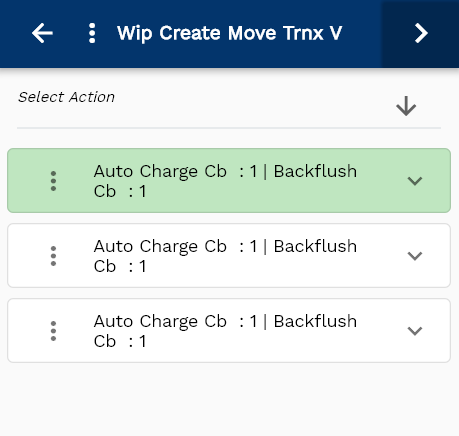
Select "WIP Move Transaction" in the action list of values
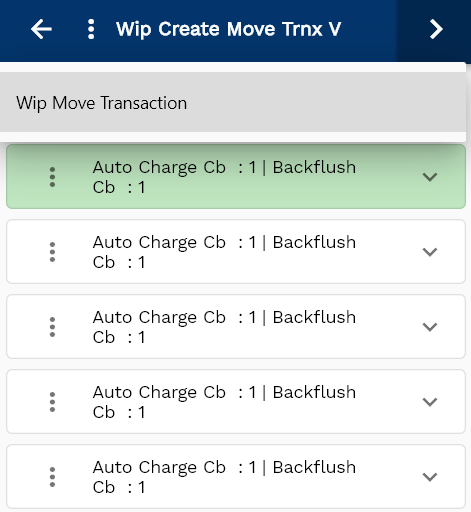
The system will take you to the move transaction form and show you the details of all the operations selected on the previous screen.
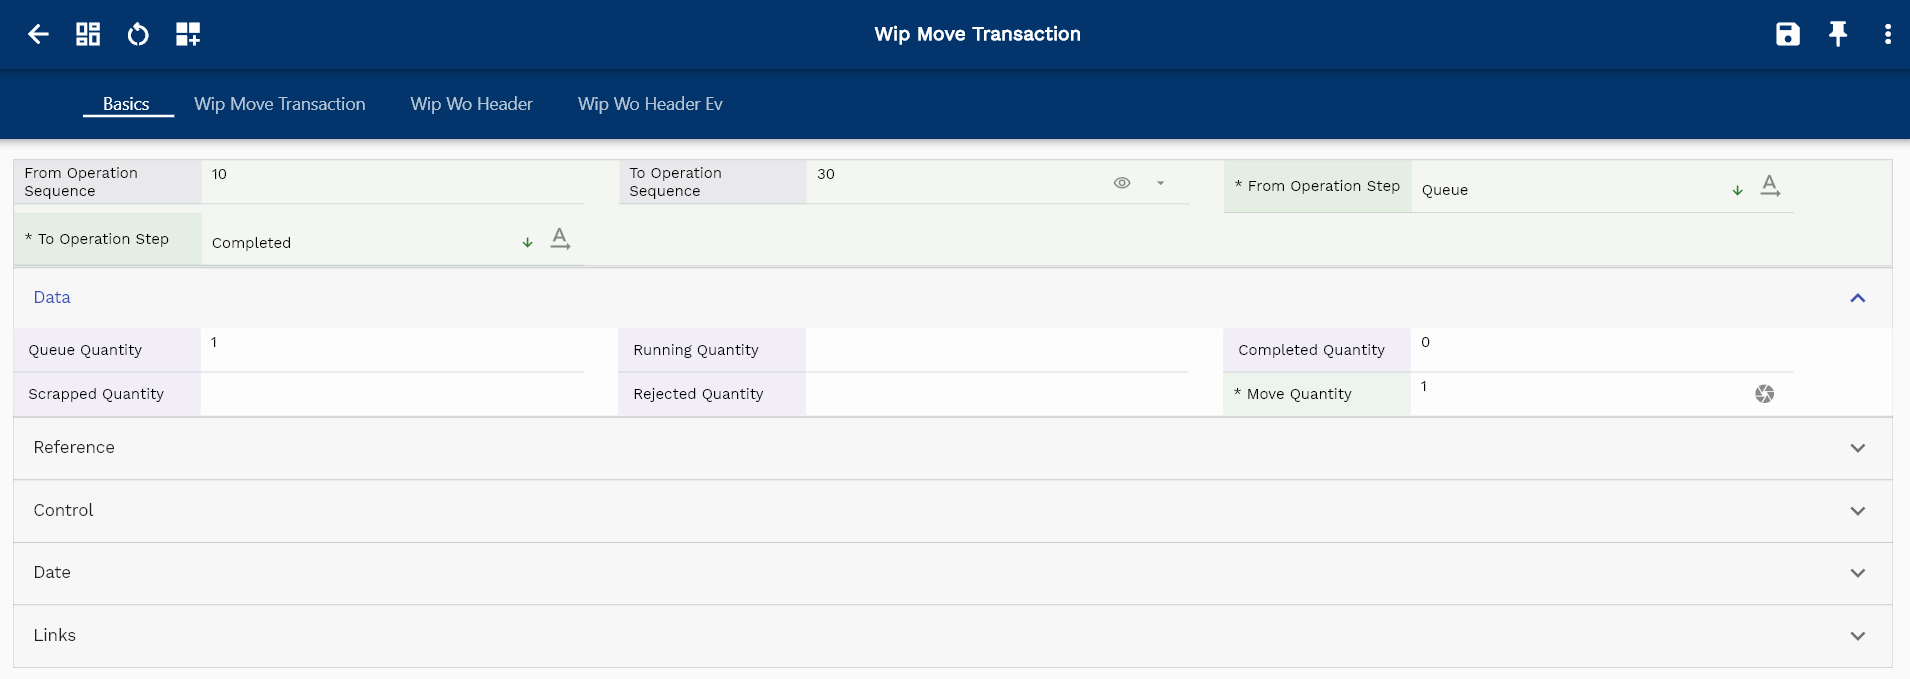
Select/Enter the below details
- From Operation Step
- To Operation Sequence
- To Operation Step
- Move Quantity
The move quantity must be less than equal to the available quantity (sum of all the quantities available in the "from" operation step)
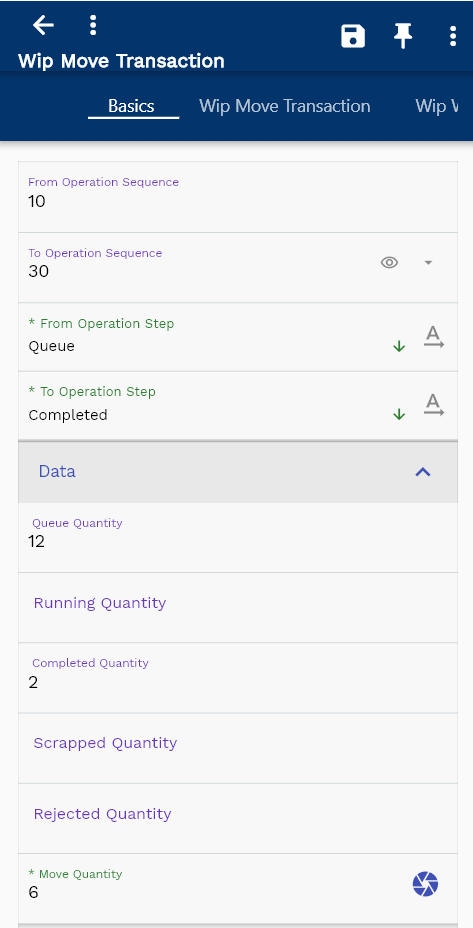
Click on the expand button to review the details of the operation.
The transaction form rearranges itself depending upon the device screen.
Enter all the other details, and click on the Save button to complete the material issue transaction.
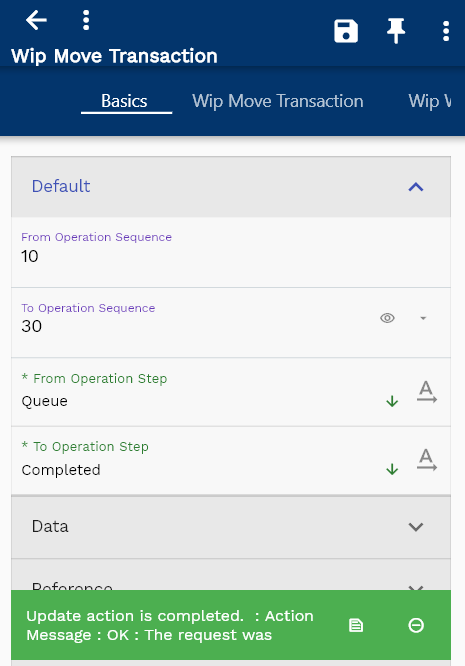
You can review all the completed transactions in the transaction view screen.
Navigate to the transaction search form and enter the work order number or other criteria to search the transaction.

You can also review the move transaction details in the move transaction form and the corresponding material/resource transactions in the inventory transaction form.
//TODO reference of move transaction number on inventory transaction
