Customer
This documentation is incomplete.
A customer is a person or an internal/external organization that purchases products or services from a business organization. Customers are defined at a global level and assigned to a business organization. In inoERP, you can create a customer using the customer screen. You need to define the customer and all other related entities before you can use the customer for sales and AR purposes.
- Customer
- Customer Site
- Customer BU
Header
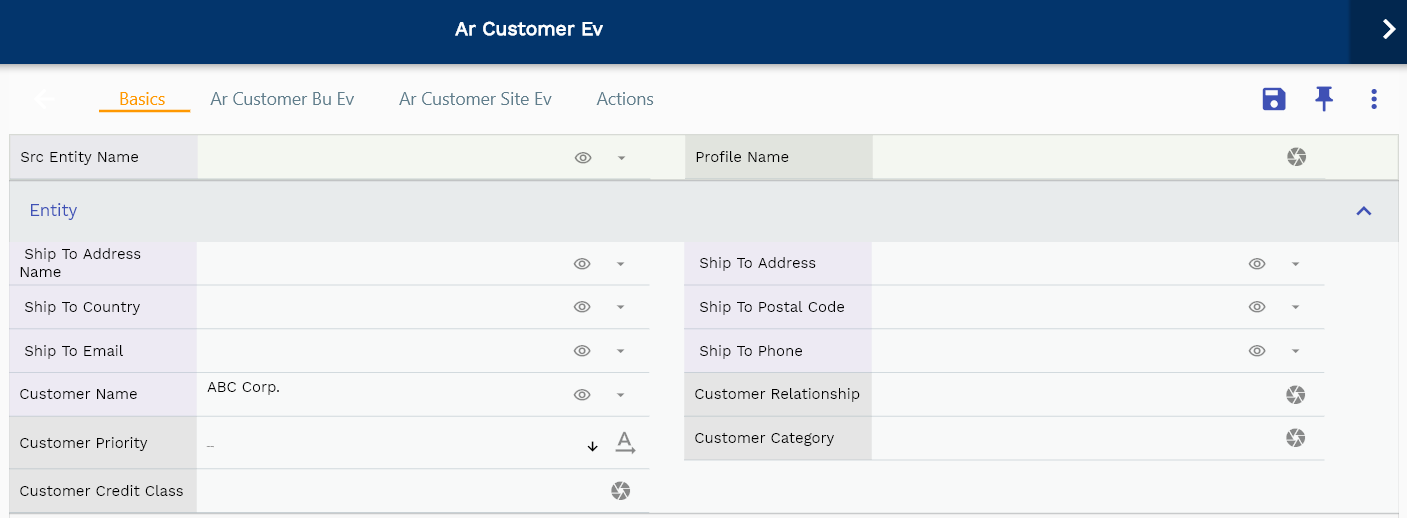
A customer header contains customer name, number, type, status, etc.
To view/create/update a customer, navigate to the "customer" search screen from your dashboard/favorite.

Enter the customer details or any other criteria in the search form and click on the search button to view an existing customer.
Click on create a new button to create a new customer; by manually entering all the information,
Copy an existing customer to a new customer is always better than manually entering all the data to create a new customer.
The application lets you update all the details before confirmation; you can configure which fields are view-only after the confirmation.

If you don't enter organization/customer details, the system will show you all the customers. If your organization has configured to make any field mandatory for search, then you have to enter those fields to search customers.
The application will fetch all the server data and take you to the search result screen. The search result screen looks a bit different on desktop and mobile devices.

To view the search result in a table format, click on the table icon available on the bottom left corner.
To open a specific customer, click on the menu of that record, and click on view/fetch & view.
You can also click on the expand icon against any item on the search result screen to view the customer header details such as customer number, quantities, start date, status, etc.
The system will fetch all the data related to the selected customer. Depending on the device size, the customer details are shown either right to the search result screen or on a separate screen.
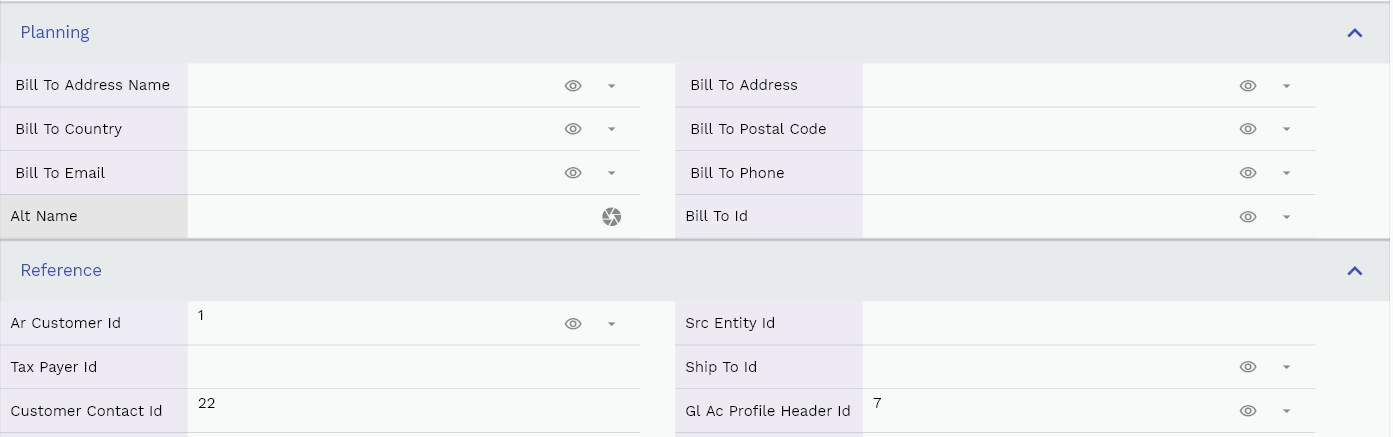
Scroll left, right, up, down to view all the details. The customer line and details are shown in a separate tab. The default configuration shows fields in various functional groups such as
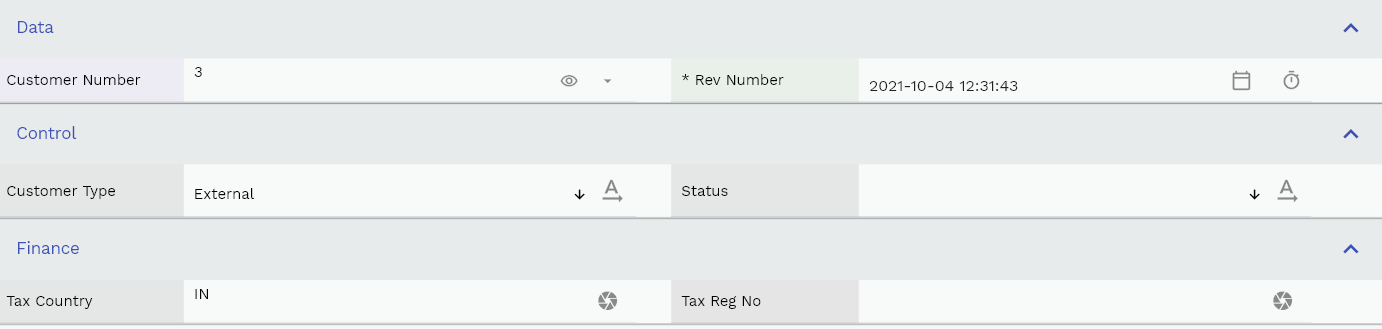
- Finance
- Entity
- Reference
- Data
- Control
- Etc
You can configure the application to show which fields should be shown under which group. You can also create new groups as per your business requirements.
All Fields
| Name | Sequence | Label | InputType | Field Group |
|---|---|---|---|---|
| 10 | vvShipToAddressName | Ship To Address Name | deferredSelect | ENTITY |
| 10 | vvShipToAddress | Ship To Address | deferredSelect | ENTITY |
| 20 | vvShipToCountry | Ship To Country | deferredSelect | ENTITY |
| 30 | vvShipToPostalCode | Ship To Postal Code | deferredSelect | ENTITY |
| 40 | vvShipToEmail | Ship To Email | deferredSelect | ENTITY |
| 50 | vvShipToPhone | Ship To Phone | deferredSelect | ENTITY |
| 60 | vvBillToAddressName | Bill To Address Name | deferredSelect | PLANNING |
| 70 | vvBillToAddress | Bill To Address | deferredSelect | PLANNING |
| 80 | vvBillToCountry | Bill To Country | deferredSelect | PLANNING |
| 90 | vvBillToPostalCode | Bill To Postal Code | deferredSelect | PLANNING |
| 100 | vvBillToEmail | Bill To Email | deferredSelect | PLANNING |
| 110 | vvBillToPhone | Bill To Phone | deferredSelect | PLANNING |
| 120 | arCustomerId | Ar Customer Id | deferredSelect | REFERENCE |
| 130 | srcEntityName | Src Entity Name | deferredSelect | DEFAULT |
| 140 | srcEntityId | Src Entity Id | InputType.textField | REFERENCE |
| 150 | customerNumber | Customer Number | deferredSelect | DATA |
| 160 | customerName | Customer Name | deferredSelect | ENTITY |
| 170 | customerRelationship | Customer Relationship | InputType.textField | ENTITY |
| 180 | altName | Alt Name | InputType.textField | PLANNING |
| 190 | customerType | Customer Type | InputType.select | CONTROL |
| 200 | customerPriority | Customer Priority | InputType.select | ENTITY |
| 210 | customerCategory | Customer Category | InputType.textField | ENTITY |
| 220 | taxCountry | Tax Country | InputType.textField | FINANCE |
| 230 | taxRegNo | Tax Reg No | InputType.textField | FINANCE |
| 240 | taxPayerId | Tax Payer Id | InputType.textField | REFERENCE |
| 250 | shipToId | Ship To Id | deferredSelect | REFERENCE |
| 260 | billToId | Bill To Id | deferredSelect | PLANNING |
| 270 | customerContactId | Customer Contact Id | InputType.number | REFERENCE |
| 280 | customerCreditClass | Customer Credit Class | InputType.number | ENTITY |
| 290 | profileName | Profile Name | InputType.textField | DEFAULT |
| 300 | status | Status | InputType.select | CONTROL |
| 320 | revNumber | Rev Number | InputType.dateTime | DATA |
| 360 | glAcProfileHeaderId | Gl Ac Profile Header Id | deferredSelect | REFERENCE |
| 5310 | createdBy | Created By | InputType.textField | REFERENCE |
| 5330 | creationDate | Creation Date | InputType.dateTime | REFERENCE |
| 5340 | lastUpdatedBy | Last Updated By | InputType.textField | REFERENCE |
| 5350 | lastUpdateDate | Last Update Date | InputType.dateTime | REFERENCE |
Customer BU
Customer BU(Business Unit) relationship represents the attributes of the business relationship that a business organization can enter into with a customer. Customer-BU contains information about the terms and conditions of doing business with the customer. You can assign the same customer to multiple business units.
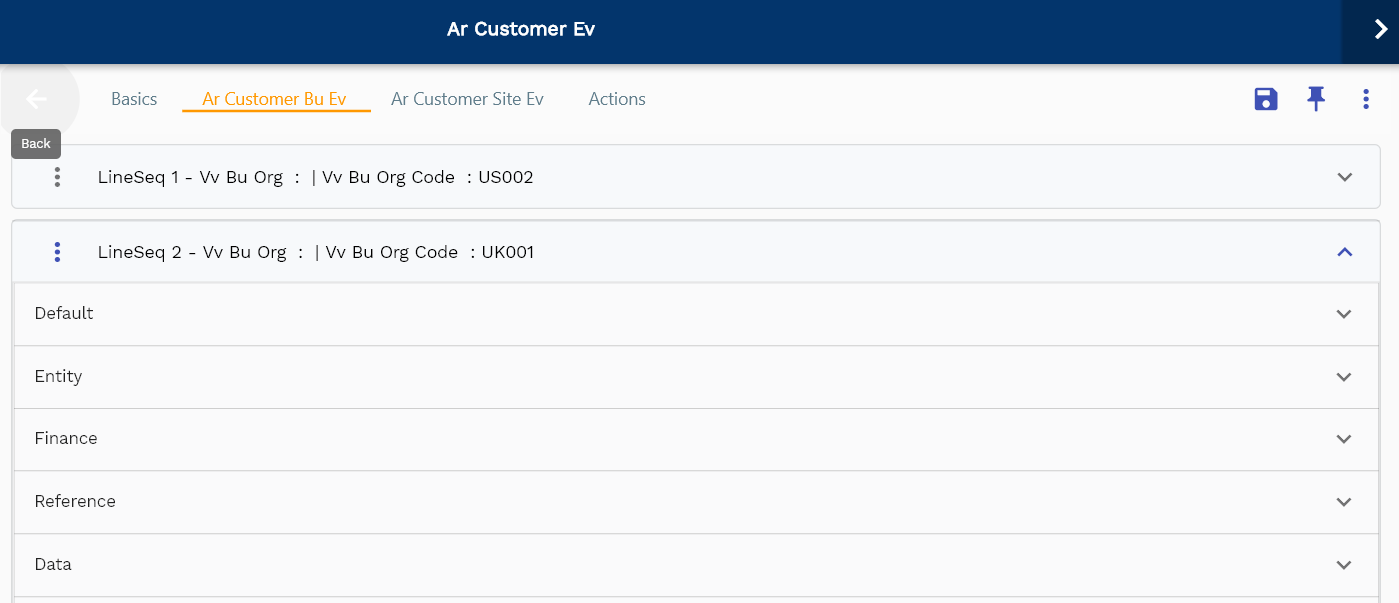
Navigate to the lines tab to view/add/update lines.
Click on the add new entity to add a new line. If a line already exists, click on copy entity to copy all the details.
You can enable/disable fields allowed to be copied in the menu configuration.

Define Payment Terms and Price Lists before creating customer-bu relationship. When you manually create a document, the application defaults these values to sales documents (Sales Order, Sales Quote, etc.).

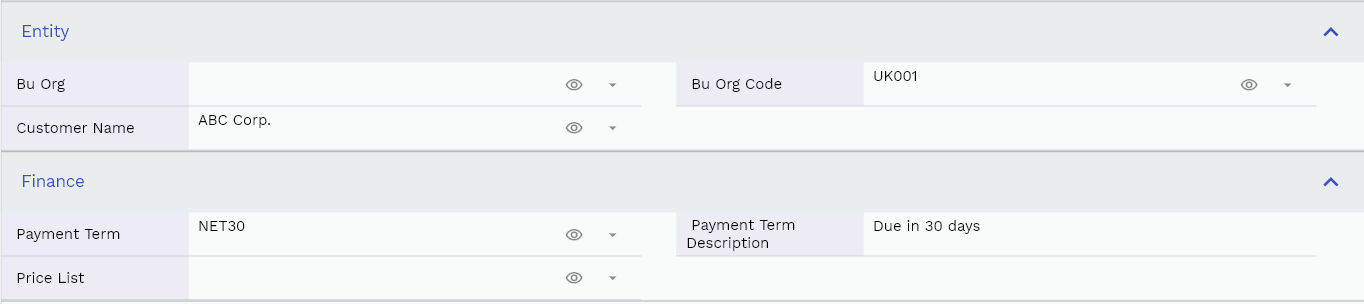
The entity group shows information related to business organization, customer, etc.
The reference groups show various ids for reference only. You don't need to enter any information in this section. When you save a customer for the first time, the system will auto-populate the newly created header id and line ids.
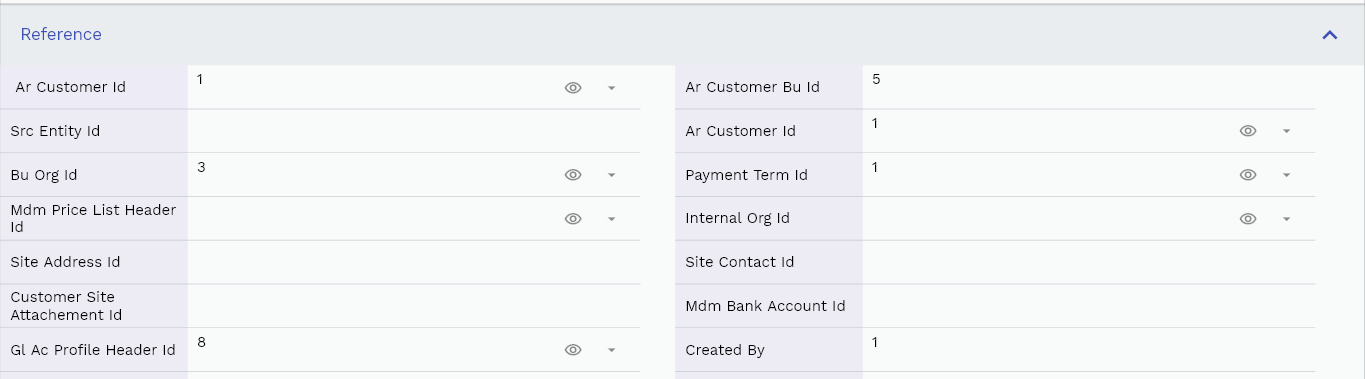
Scroll left, right, up, and down view all other fields.
Enter all the other fields and click on the save button to save the customer. The app will post all the data to the server and will show the messages returned from the server.
All Fields
| Name | Sequence | Label | InputType | Field Group |
|---|---|---|---|---|
| 10 | vvBuOrg | Bu Org | deferredSelect | ENTITY |
| 10 | vvBuOrgCode | Bu Org Code | deferredSelect | ENTITY |
| 20 | vvPaymentTerm | Payment Term | deferredSelect | FINANCE |
| 30 | vvPaymentTermDescription | Payment Term Description | InputType.textField | FINANCE |
| 40 | vvArCustomerId | Ar Customer Id | deferredSelect | REFERENCE |
| 50 | vvCustomerNumber | Customer Number | deferredSelect | DATA |
| 60 | vvCustomerName | Customer Name | deferredSelect | ENTITY |
| 70 | vvPriceList | Price List | deferredSelect | FINANCE |
| 80 | arCustomerBuId | Ar Customer Bu Id | InputType.number | REFERENCE |
| 90 | srcEntityName | Src Entity Name | deferredSelect | DEFAULT |
| 100 | srcEntityId | Src Entity Id | InputType.textField | REFERENCE |
| 110 | arCustomerId | Ar Customer Id | deferredSelect | REFERENCE |
| 120 | buOrgId | Bu Org Id | deferredSelect | REFERENCE |
| 130 | status | Status | InputType.select | CONTROL |
| 140 | paymentTermId | Payment Term Id | deferredSelect | REFERENCE |
| 150 | mdmPriceListHeaderId | Mdm Price List Header Id | deferredSelect | REFERENCE |
| 160 | internalOrgId | Internal Org Id | deferredSelect | REFERENCE |
| 170 | fob | Fob | InputType.textField | DEFAULT |
| 180 | freightTerms | Freight Terms | InputType.number | DEFAULT |
| 190 | transportation | Transportation | InputType.textField | DEFAULT |
| 200 | countryOfOrigin | Country Of Origin | InputType.textField | DEFAULT |
| 210 | siteAddressId | Site Address Id | InputType.number | REFERENCE |
| 220 | siteContactId | Site Contact Id | InputType.number | REFERENCE |
| 230 | customerSiteAttachementId | Customer Site Attachement Id | InputType.number | REFERENCE |
| 240 | mdmBankAccountId | Mdm Bank Account Id | InputType.number | REFERENCE |
| 290 | glAcProfileHeaderId | Gl Ac Profile Header Id | deferredSelect | REFERENCE |
| 5250 | createdBy | Created By | InputType.textField | REFERENCE |
| 5260 | creationDate | Creation Date | InputType.dateTime | REFERENCE |
| 5270 | lastUpdatedBy | Last Updated By | InputType.textField | REFERENCE |
| 5280 | lastUpdateDate | Last Update Date | InputType.dateTime | REFERENCE |
Customer Site
A customer site is a specific location of the customer. Most of the time, it is the location where a party is physically located. A customer can have multiple sites.
The customer site is used for billing, shipping, or other purposes.
Depending upon your configuration, the details of the customer site are shown either on a separate tab or in the links section of the customer.

Click on the "Menu Button" to add/copy an existing site to a new site.
You cant delete a customer site once it's created.

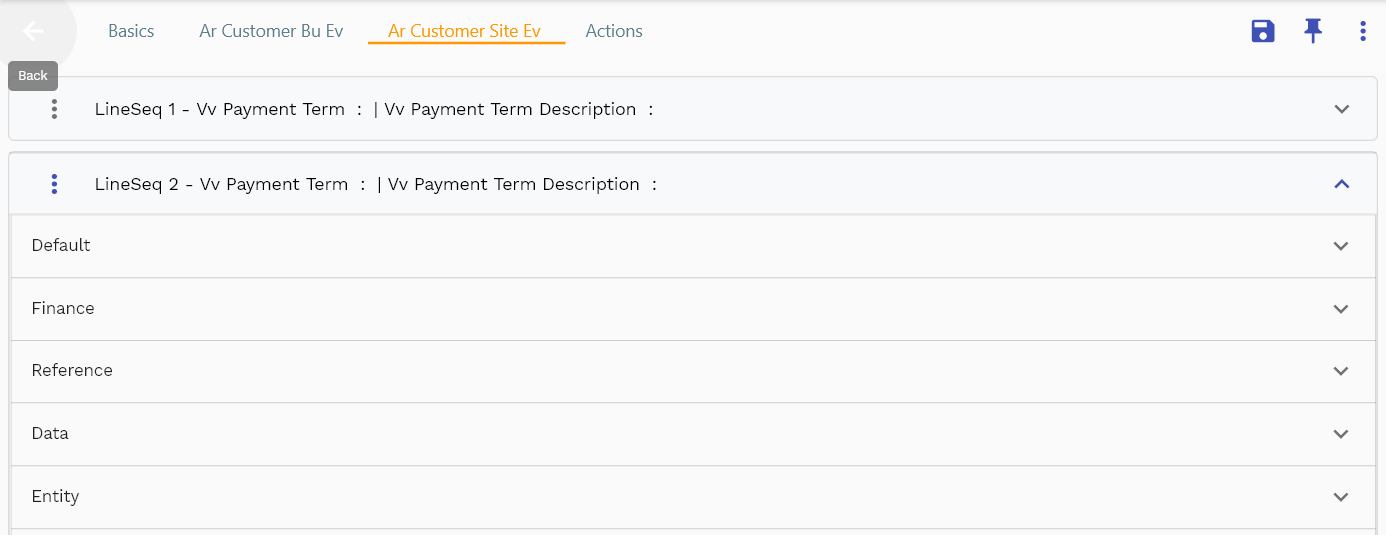
Click on the expandable button to view the fields of any group of elements.
To create a new site, click on Add New Line button. You can also copy an existing site to a new one by clicking on the Copy Line button.

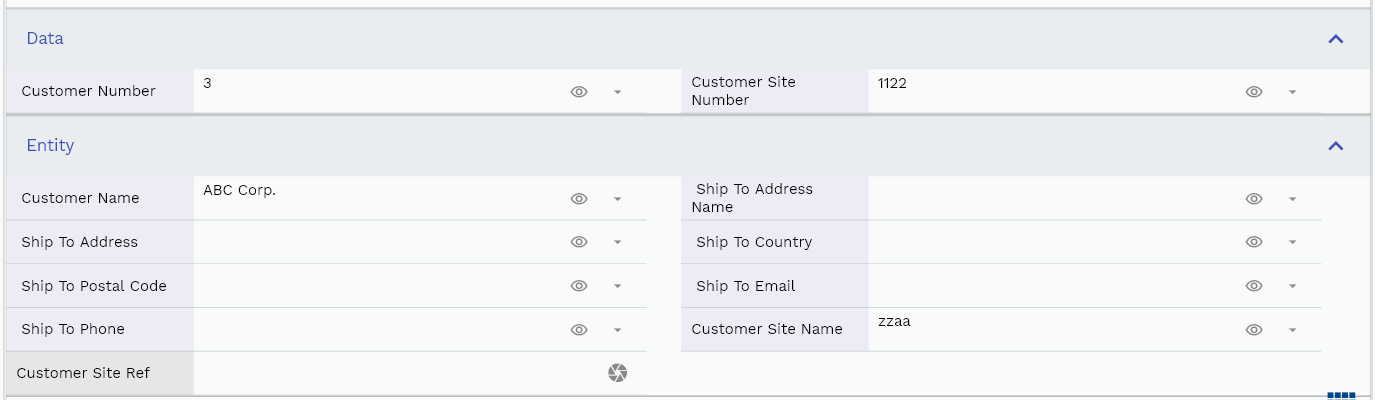
Enter the customer site number and customer site name in the data section. Both are mandatory fields and are shown on most of the screen that shows customer data.
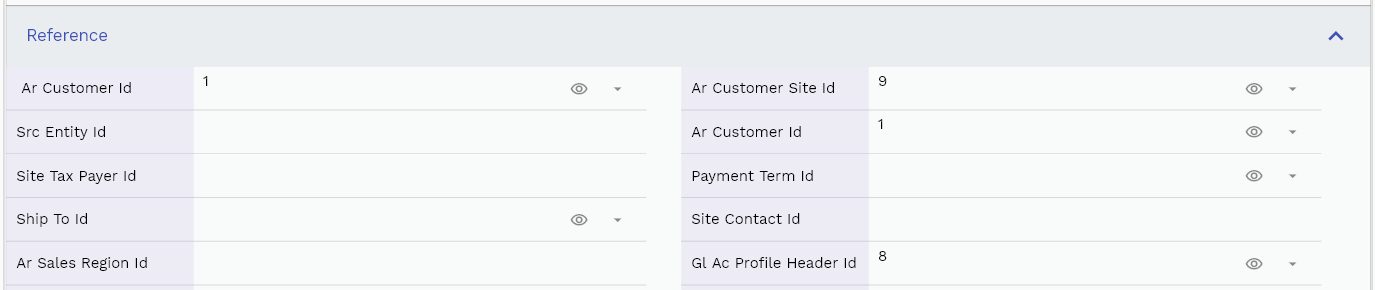
The reference groups show various ids for reference only. You don't need to enter any information in this section.
All Fields
| Name | Sequence | Label | InputType | Field Group |
|---|---|---|---|---|
| 10 | vvPaymentTerm | Payment Term | deferredSelect | FINANCE |
| 10 | vvPaymentTermDescription | Payment Term Description | InputType.textField | FINANCE |
| 20 | vvArCustomerId | Ar Customer Id | deferredSelect | REFERENCE |
| 30 | vvCustomerNumber | Customer Number | deferredSelect | DATA |
| 40 | vvCustomerName | Customer Name | deferredSelect | ENTITY |
| 50 | vvShipToAddressName | Ship To Address Name | deferredSelect | ENTITY |
| 60 | vvShipToAddress | Ship To Address | deferredSelect | ENTITY |
| 70 | vvShipToCountry | Ship To Country | deferredSelect | ENTITY |
| 80 | vvShipToPostalCode | Ship To Postal Code | deferredSelect | ENTITY |
| 90 | vvShipToEmail | Ship To Email | deferredSelect | ENTITY |
| 100 | vvShipToPhone | Ship To Phone | deferredSelect | ENTITY |
| 110 | vvBillToAddressName | Bill To Address Name | deferredSelect | PLANNING |
| 120 | vvBillToAddress | Bill To Address | deferredSelect | PLANNING |
| 130 | vvBillToCountry | Bill To Country | deferredSelect | PLANNING |
| 140 | vvBillToPostalCode | Bill To Postal Code | deferredSelect | PLANNING |
| 150 | vvBillToEmail | Bill To Email | deferredSelect | PLANNING |
| 160 | vvBillToPhone | Bill To Phone | deferredSelect | PLANNING |
| 170 | arCustomerSiteId | Ar Customer Site Id | deferredSelect | REFERENCE |
| 180 | srcEntityName | Src Entity Name | deferredSelect | DEFAULT |
| 190 | srcEntityId | Src Entity Id | InputType.textField | REFERENCE |
| 200 | arCustomerId | Ar Customer Id | deferredSelect | REFERENCE |
| 210 | customerSiteNumber | Customer Site Number | deferredSelect | DATA |
| 220 | customerSiteName | Customer Site Name | deferredSelect | ENTITY |
| 230 | siteTaxCountry | Site Tax Country | InputType.textField | FINANCE |
| 240 | siteTaxRegNo | Site Tax Reg No | InputType.textField | FINANCE |
| 250 | siteTaxPayerId | Site Tax Payer Id | InputType.textField | REFERENCE |
| 260 | primaryCb | Primary Cb | InputType.switchField | DEFAULT |
| 270 | customerSiteRef | Customer Site Ref | InputType.textField | ENTITY |
| 280 | customerSiteType | Customer Site Type | InputType.textField | CONTROL |
| 290 | status | Status | InputType.select | CONTROL |
| 300 | currency | Currency | deferredSelect | FINANCE |
| 310 | paymentTermId | Payment Term Id | deferredSelect | REFERENCE |
| 320 | fob | Fob | InputType.textField | DEFAULT |
| 330 | freightTerms | Freight Terms | InputType.number | DEFAULT |
| 340 | transportation | Transportation | InputType.textField | DEFAULT |
| 350 | countryOfOrigin | Country Of Origin | InputType.textField | DEFAULT |
| 360 | shipToId | Ship To Id | deferredSelect | REFERENCE |
| 370 | billToId | Bill To Id | deferredSelect | PLANNING |
| 380 | siteContactId | Site Contact Id | InputType.number | REFERENCE |
| 390 | arSalesRegionId | Ar Sales Region Id | InputType.number | REFERENCE |
| 440 | glAcProfileHeaderId | Gl Ac Profile Header Id | deferredSelect | REFERENCE |
| 5400 | createdBy | Created By | InputType.textField | REFERENCE |
| 5410 | creationDate | Creation Date | InputType.dateTime | REFERENCE |
| 5420 | lastUpdatedBy | Last Updated By | InputType.textField | REFERENCE |
| 5430 | lastUpdateDate | Last Update Date | InputType.dateTime | REFERENCE |
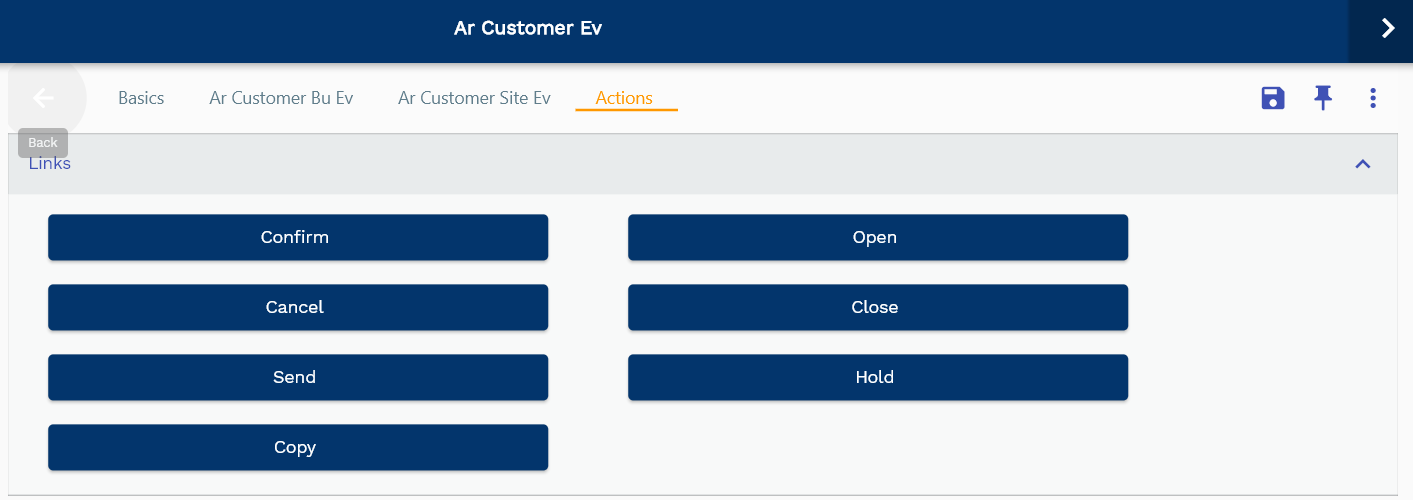
Actions
Actions allow you to change the status of the customer. The system creates customers in draft status. When you are ready to publish the customer and send it, change it to Confirmed. You can cancel a customer by clicking on the Cancel button. Similarly, you can close any customer by clicking on the Close button.