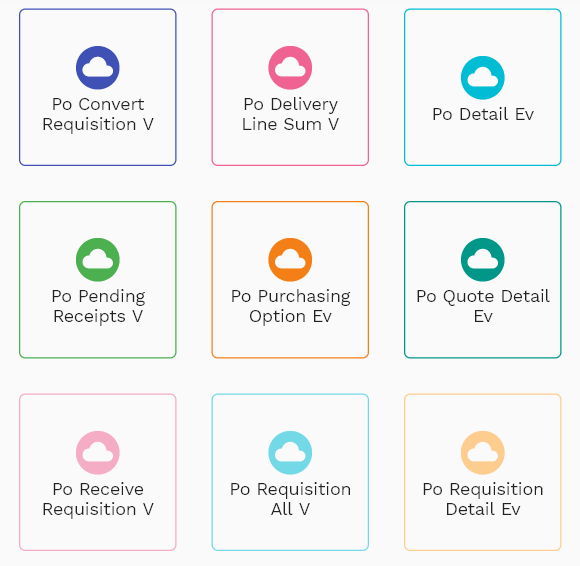
Configuration
This documentation is incomplete.
Use the purchasing configurations to manage all aspects of your purchasing processes. Purchasing processes default values from various settings to documents and transactions to simplify data entry and automate various transactions
Purchasing Option
Purchasing option is defined at the Business Unit level. It can be used to default various values such as Payment Term, Price List, etc., on purchasing documents (sourcing rule, Quote, Requisition, PO, etc.)
To view/create/update a purchasing option, navigate to the "purchasing option" search screen from your dashboard/favorite.
Enter the organization/purchasing option details or any other criteria in the search form and click on the search button to view an existing purchasing option.
Click on create a new button to create a new purchasing option; by manually entering all the information,
You can create purchasing options only for newly created business units. The business unit name is not updatable once a purchasing option is saved for a business unit.
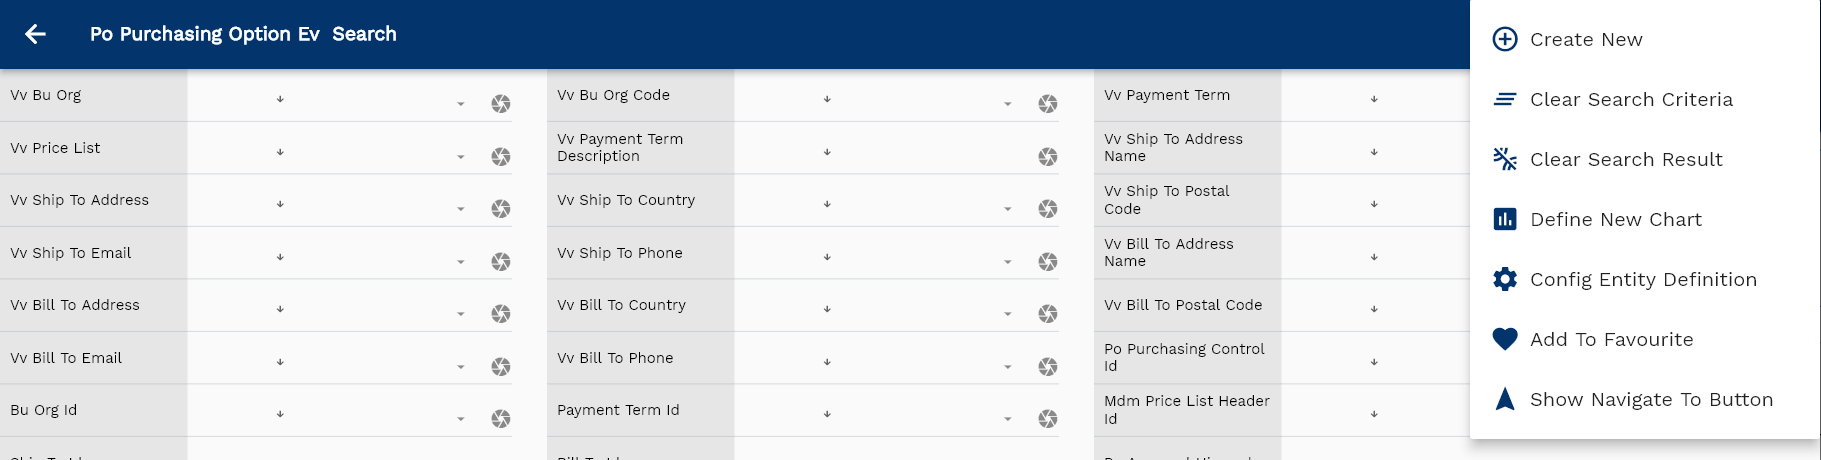
If you don't enter organization details, the system will show you all the purchasing options. If your organization has configured to make any field mandatory for search, then you have to enter those fields to search purchasing options.
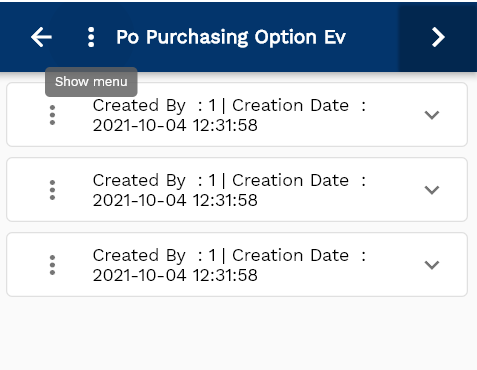
The application will fetch all the server data and take you to the search result screen. The search result screen looks a bit different on desktop and mobile devices.
To view the search result in a table format, click on the table icon available in the bottom left corner.
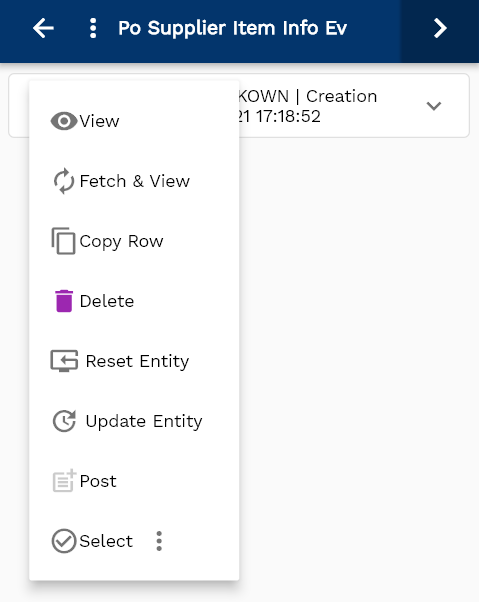
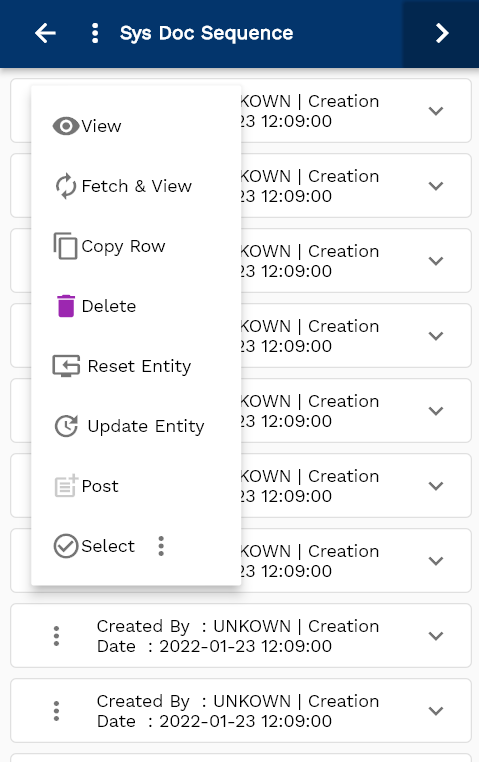
To open a specific purchasing option, click on the menu of that record, and click on view/fetch & view.
You can also click on the expand icon against any item on the search result screen to view the purchasing option details such as business unit name, payment term, price list, etc.
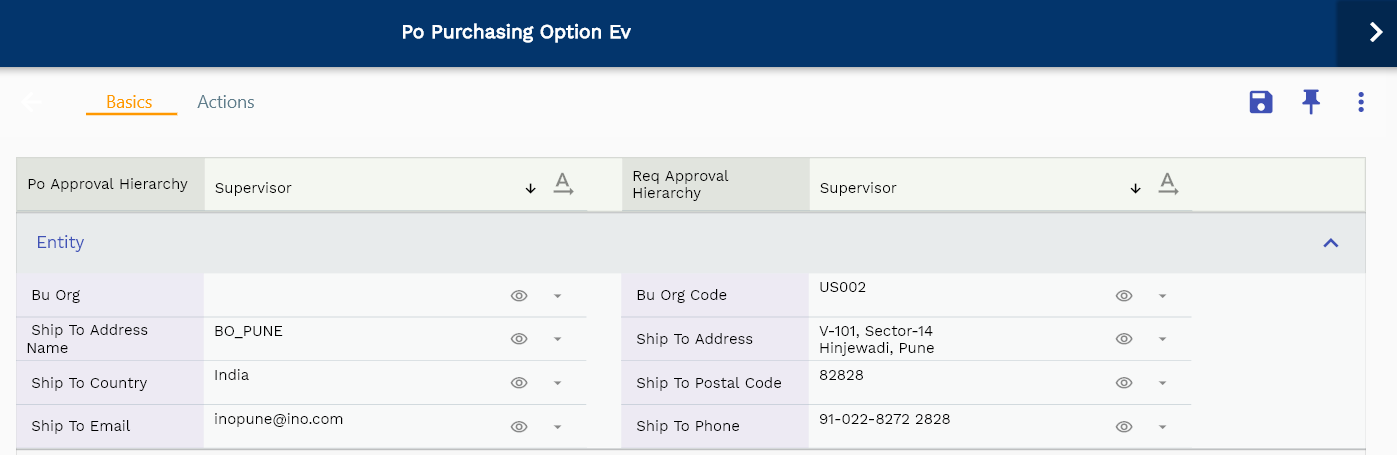
The system will fetch all the data related to the selected purchasing option. Depending on the device size, the purchasing option details are shown either right to the search result screen or on a separate screen.

Scroll left, right, up, and down to view all the details. The purchasing option line and details are shown in a separate tab. The default configuration shows fields in various functional groups, such as
- Finance
- Entity
- Reference
- Data
- Control
- Etc
You can configure the application to show which fields should be shown under which group. You can also create new groups as per your business requirements.

All Fields
| Name | Sequence | Label | InputType | Field Group |
|---|---|---|---|---|
| 10 | vvBuOrg | Bu Org | deferredSelect | ENTITY |
| 10 | vvBuOrgCode | Bu Org Code | deferredSelect | ENTITY |
| 20 | vvPaymentTerm | Payment Term | deferredSelect | FINANCE |
| 30 | vvPriceList | Price List | deferredSelect | FINANCE |
| 40 | vvPaymentTermDescription | Payment Term Description | InputType.textField | FINANCE |
| 50 | vvShipToAddressName | Ship To Address Name | deferredSelect | ENTITY |
| 60 | vvShipToAddress | Ship To Address | deferredSelect | ENTITY |
| 70 | vvShipToCountry | Ship To Country | deferredSelect | ENTITY |
| 80 | vvShipToPostalCode | Ship To Postal Code | deferredSelect | ENTITY |
| 90 | vvShipToEmail | Ship To Email | deferredSelect | ENTITY |
| 100 | vvShipToPhone | Ship To Phone | deferredSelect | ENTITY |
| 110 | vvBillToAddressName | Bill To Address Name | deferredSelect | PLANNING |
| 120 | vvBillToAddress | Bill To Address | deferredSelect | PLANNING |
| 130 | vvBillToCountry | Bill To Country | deferredSelect | PLANNING |
| 140 | vvBillToPostalCode | Bill To Postal Code | deferredSelect | PLANNING |
| 150 | vvBillToEmail | Bill To Email | deferredSelect | PLANNING |
| 160 | vvBillToPhone | Bill To Phone | deferredSelect | PLANNING |
| 170 | poPurchasingControlId | Po Purchasing Control Id | InputType.number | REFERENCE |
| 180 | buOrgId | Bu Org Id | deferredSelect | REFERENCE |
| 190 | paymentTermId | Payment Term Id | deferredSelect | REFERENCE |
| 200 | mdmPriceListHeaderId | Mdm Price List Header Id | deferredSelect | REFERENCE |
| 210 | shipToId | Ship To Id | deferredSelect | REFERENCE |
| 220 | billToId | Bill To Id | deferredSelect | PLANNING |
| 230 | poApprovalHierarchy | Po Approval Hierarchy | InputType.select | DEFAULT |
| 240 | reqApprovalHierarchy | Req Approval Hierarchy | InputType.select | DEFAULT |
| 250 | invOrgId | Inv Org Id | deferredSelect | REFERENCE |
| 260 | defaultLineType | Default Line Type | InputType.select | CONTROL |
| 5270 | createdBy | Created By | InputType.textField | REFERENCE |
| 5280 | creationDate | Creation Date | InputType.dateTime | REFERENCE |
| 5290 | lastUpdatedBy | Last Updated By | InputType.textField | REFERENCE |
| 5300 | lastUpdateDate | Last Update Date | InputType.dateTime | REFERENCE |
Sourcing Rule
If your organization purchases and manufactures the same item from multiple sources, you can create a sourcing rule to specify sourcing preference details. Sourcing rules are created in the sourcing rule screen and assigned to items on the organization item level. The sourcing rules specify how to replenish items in an organization, such as purchased items in an organization.
A sourcing rule can be assigned to multiple items. Currently, the sourcing rule is used by planning engines to automatically create requisitions and purchase orders. If you are creating requisitions and purchase orders without a planning engine, you don't need to define sourcing rules.
To view/create/update a sourcing rule, navigate to the "sourcing rule" search screen from your dashboard/favorite.
Enter the organization/sourcing rule details or any other criteria in the search form and click on the search button to view an existing sourcing rule.
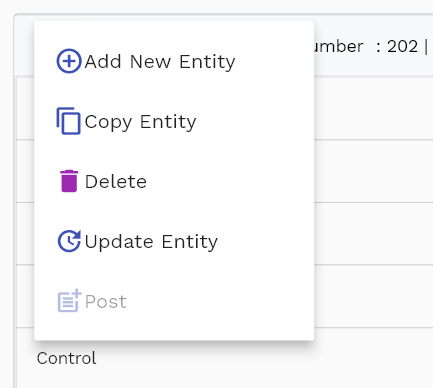
Click on create a new button to create a new sourcing rule; by manually entering all the information,
Copying an existing sourcing rule to a new sourcing rule is always better than manually entering all the data to create a new sourcing rule.
The application lets you update all the details before confirmation; you can configure which fields are view-only after the confirmation.
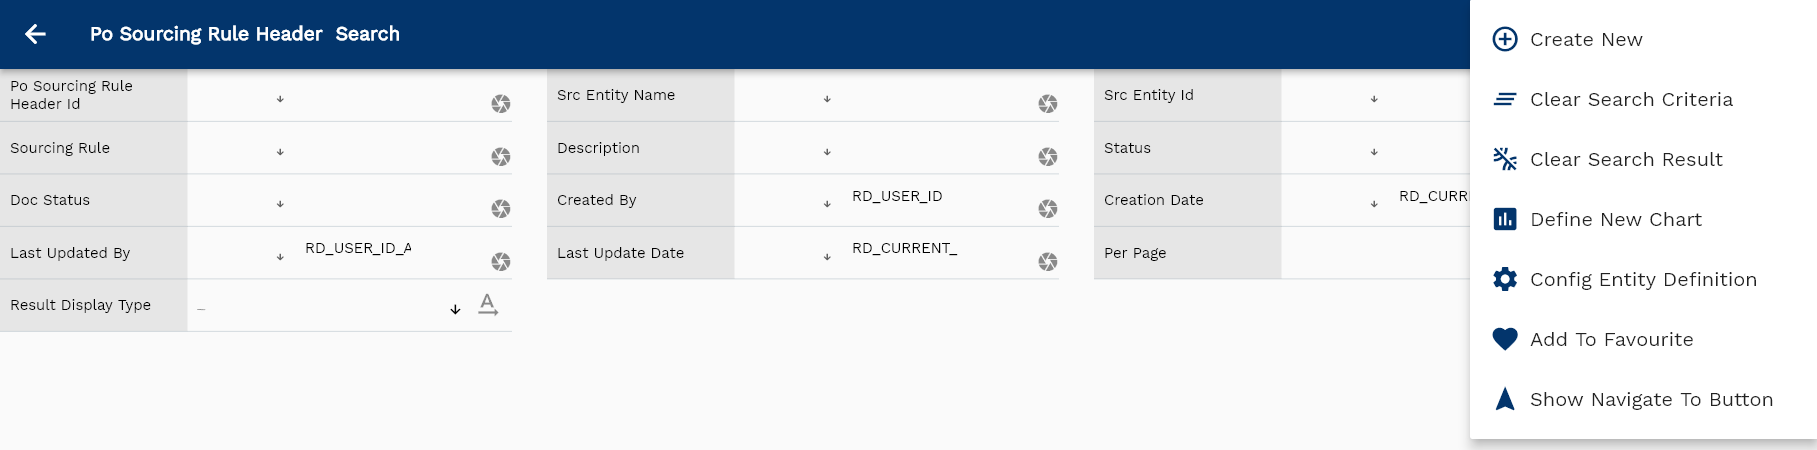
If you don't enter organization details, the system will show you all the sourcing rules. If your organization has configured to make any field mandatory for search, then you have to enter those fields to search sourcing rules.
The application will fetch all the server data and take you to the search result screen. The search result screen looks a bit different on desktop and mobile devices.
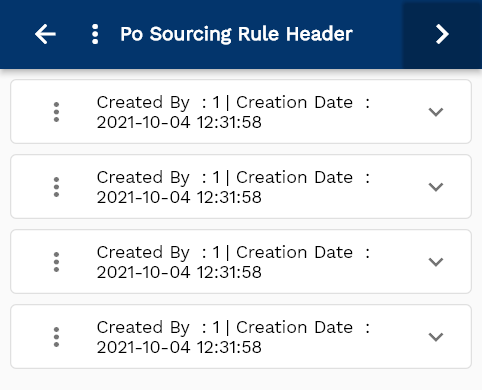
To view the search result in a table format, click on the table icon available in the bottom left corner.
To open a specific sourcing rule, click on the menu of that record, and click on view/fetch & view.
You can also click on the expand icon against any item on the search result screen to view the sourcing rule details such as business unit name, payment term, price list, etc.
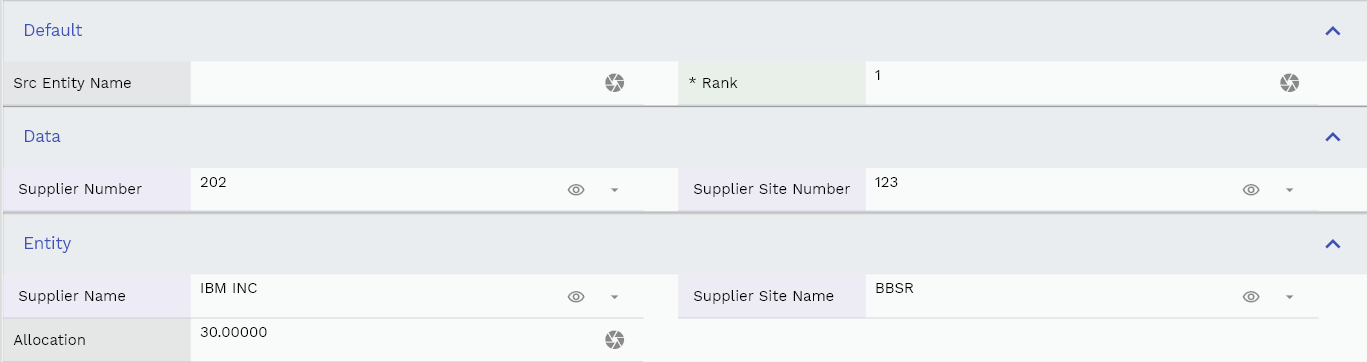
The system will fetch all the data related to the selected sourcing rule. The sourcing rule details are shown either right on the search result screen or on a separate screen, depending on the device size.

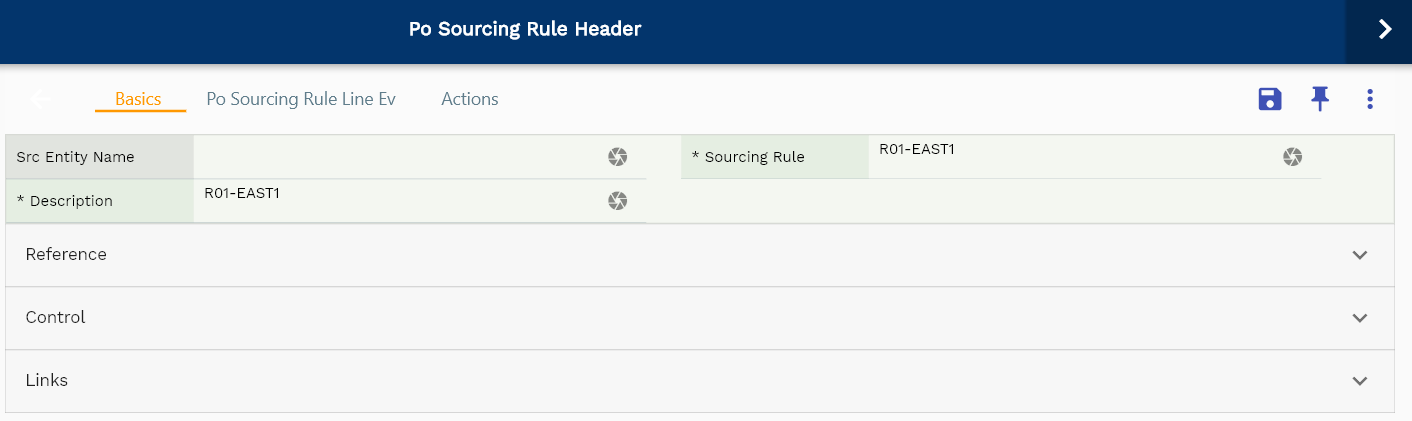
Scroll left, right, up, and down to view all the details. The sourcing rule line and details are shown in a separate tab. The default configuration shows fields in various functional groups, such as
- Finance
- Entity
- Reference
- Data
- Control
- Etc
You can configure the application to show which fields should be shown under which group. You can also create new groups as per your business requirements.
All Header Fields
| Name | Sequence | Label | InputType | Field Group |
|---|---|---|---|---|
| 10 | poSourcingRuleHeaderId | Po sourcing rule Header Id | InputType.number | REFERENCE |
| 10 | srcEntityName | Src Entity Name | InputType.textField | DEFAULT |
| 20 | srcEntityId | Src Entity Id | InputType.textField | REFERENCE |
| 30 | sourcingRule | sourcing rule | InputType.textField | DEFAULT |
| 40 | description | Description | InputType.textField | DEFAULT |
| 50 | status | Status | InputType.textField | CONTROL |
| 100 | docStatus | Doc Status | InputType.select | CONTROL |
| 5060 | createdBy | Created By | InputType.textField | REFERENCE |
| 5070 | creationDate | Creation Date | InputType.dateTime | REFERENCE |
| 5080 | lastUpdatedBy | Last Updated By | InputType.textField | REFERENCE |
| 5090 | lastUpdateDate | Last Update Date | InputType.dateTime | REFERENCE |
All Line Fields
| Name | Sequence | Label | InputType | Field Group |
|---|---|---|---|---|
| 10 | vvSupplierNumber | Supplier Number | deferredSelect | DATA |
| 10 | vvSupplierName | Supplier Name | deferredSelect | ENTITY |
| 20 | vvSupplierSiteNumber | Supplier Site Number | deferredSelect | DATA |
| 30 | vvSupplierSiteName | Supplier Site Name | deferredSelect | ENTITY |
| 40 | poSourcingRuleLineId | Po sourcing rule Line Id | InputType.number | REFERENCE |
| 50 | srcEntityName | Src Entity Name | InputType.textField | DEFAULT |
| 60 | srcEntityId | Src Entity Id | InputType.textField | REFERENCE |
| 70 | poSourcingRuleHeaderId | Po sourcing rule Header Id | InputType.number | REFERENCE |
| 80 | sourcingType | Sourcing Type | InputType.textField | CONTROL |
| 90 | sourceFromOrgId | Source From Org Id | deferredSelect | REFERENCE |
| 100 | supplierId | Supplier Id | deferredSelect | REFERENCE |
| 110 | supplierSiteId | Supplier Site Id | deferredSelect | REFERENCE |
| 120 | allocation | Allocation | InputType.textField | ENTITY |
| 130 | rank | Rank | InputType.number | DEFAULT |
| 140 | transitTime | Transit Time | InputType.number | DATE |
| 190 | docStatus | Doc Status | InputType.select | CONTROL |
| 5150 | createdBy | Created By | InputType.textField | REFERENCE |
| 5160 | creationDate | Creation Date | InputType.dateTime | REFERENCE |
| 5170 | lastUpdatedBy | Last Updated By | InputType.textField | REFERENCE |
| 5180 | lastUpdateDate | Last Update Date | InputType.dateTime | REFERENCE |
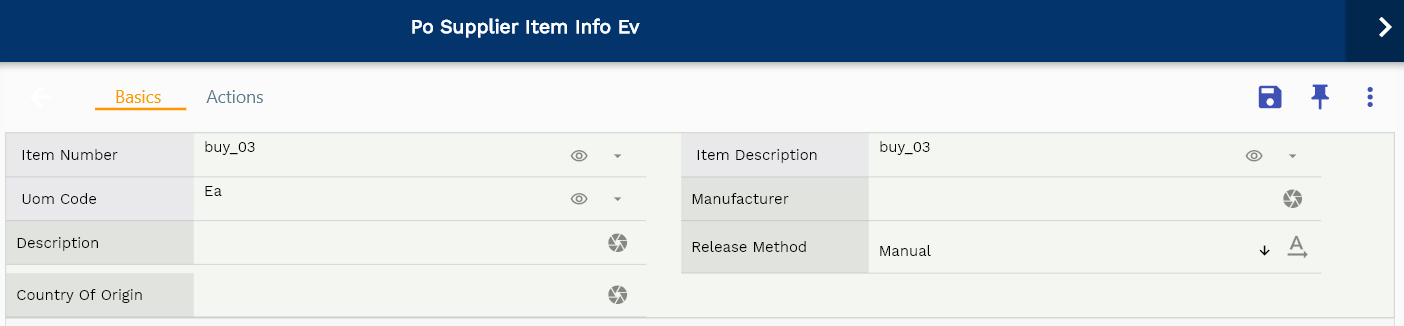
Supplier Item Info
@deprecated Use sourcing rule to enter all supplier-specific information.
Supplier item Info record is a source of information for purchasing a certain item and the supplier/site of that item. It contains data such as the supplier minimum order quantity, maximum order quantity, fixed lot multiplier, price, lead time, etc. You can maintain supplier item Info on a supplier or supplier site level. If supplier item Info records are not maintained for an item, the system uses the corresponding values from the item master.
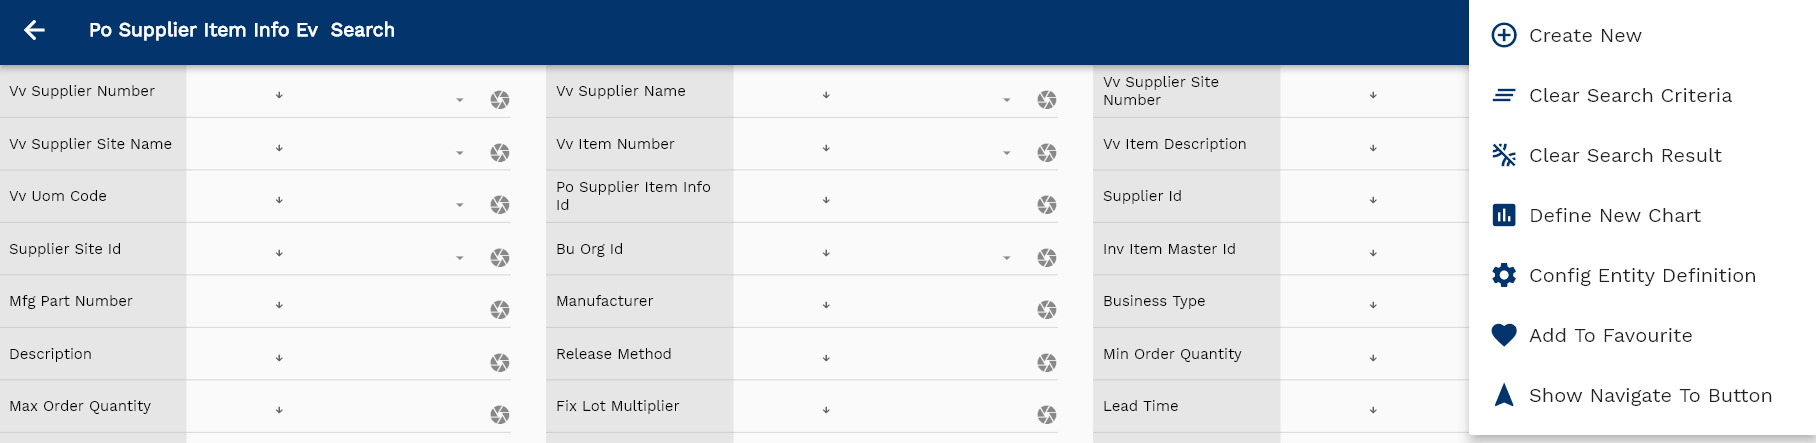
To view/create/update a supplier item Info, navigate to the "supplier item Info" search screen from your dashboard/favorite.
Enter the organization/supplier item Info details or any other criteria in the search form and click on the search button to view an existing supplier item Info.
Click on create a new button to create a new supplier item Info; by manually entering all the information,
You can create supplier item Info only for newly created business units. The business unit name is not updatable once a supplier item Info is saved for a business unit.
If you don't enter organization details, the system will show you all the supplier items Infos. If your organization has configured to make any field mandatory for search, then you have to enter those fields to search supplier item Infos.
The application will fetch all the server data and take you to the search result screen. The search result screen looks a bit different on desktop and mobile devices.
To view the search result in a table format, click on the table icon available in the bottom left corner.
To open a specific supplier item Info, click on the menu of that record, and click on view/fetch & view.
You can also click on the expand icon against any item on the search result screen to view the supplier item Info details such as business unit name, payment term, price list, etc.
The system will fetch all the selected supplier item Info data. The supplier item Info details are shown either right to the search result screen or on a separate screen, depending on the device size.

Scroll left, right, up, and down to view all the details. The supplier item Infoline and details are shown in a separate tab. The default configuration shows fields in various functional groups, such as
- Finance
- Entity
- Reference
- Data
- Control
- Etc
You can configure the application to show which fields should be shown under which group. You can also create new groups as per your business requirements.

All Fields
| Name | Sequence | Label | InputType | Field Group |
|---|---|---|---|---|
| 10 | vvSupplierNumber | Supplier Number | deferredSelect | DATA |
| 10 | vvSupplierName | Supplier Name | deferredSelect | ENTITY |
| 20 | vvSupplierSiteNumber | Supplier Site Number | deferredSelect | DATA |
| 30 | vvSupplierSiteName | Supplier Site Name | deferredSelect | ENTITY |
| 40 | vvItemNumber | Item Number | deferredSelect | DEFAULT |
| 50 | vvItemDescription | Item Description | deferredSelect | DEFAULT |
| 60 | vvUomCode | Uom Code | deferredSelect | DEFAULT |
| 70 | poSupplierItemInfoId | Po supplier item Info Id | InputType.number | PLANNING |
| 80 | supplierId | Supplier Id | deferredSelect | REFERENCE |
| 90 | supplierSiteId | Supplier Site Id | deferredSelect | REFERENCE |
| 100 | buOrgId | Bu Org Id | deferredSelect | REFERENCE |
| 110 | invItemMasterId | Inv Item Master Id | deferredSelect | REFERENCE |
| 120 | mfgPartNumber | Mfg Part Number | InputType.textField | DATA |
| 130 | manufacturer | Manufacturer | InputType.textField | DEFAULT |
| 140 | businessType | Business Type | InputType.textField | CONTROL |
| 150 | description | Description | InputType.textField | DEFAULT |
| 160 | releaseMethod | Release Method | InputType.select | DEFAULT |
| 170 | minOrderQuantity | Min Order Quantity | InputType.textField | DATA |
| 180 | maxOrderQuantity | Max Order Quantity | InputType.textField | DATA |
| 190 | fixLotMultiplier | Fix Lot Multiplier | InputType.number | CONTROL |
| 200 | leadTime | Lead Time | InputType.number | PLANNING |
| 210 | unitPrice | Unit Price | InputType.textField | FINANCE |
| 220 | countryOfOrigin | Country Of Origin | InputType.textField | DEFAULT |
| 230 | status | Status | InputType.textField | CONTROL |
| 5240 | createdBy | Created By | InputType.textField | REFERENCE |
| 5250 | creationDate | Creation Date | InputType.dateTime | REFERENCE |
| 5260 | lastUpdatedBy | Last Updated By | InputType.textField | REFERENCE |
| 5270 | lastUpdateDate | Last Update Date | InputType.dateTime | REFERENCE |
Document Sequence
Document sequence generates unique numbers for various documents such as Purchase Order, Purchase Agreement, Sales Order, Delivery Number, etc. All the seeded sequence starts with the number 1. However, you can change it to a different value before starting to use the application.
A document sequence consists of 4 element
- Prefix
- Unique Number
- Suffix
- Delimiter
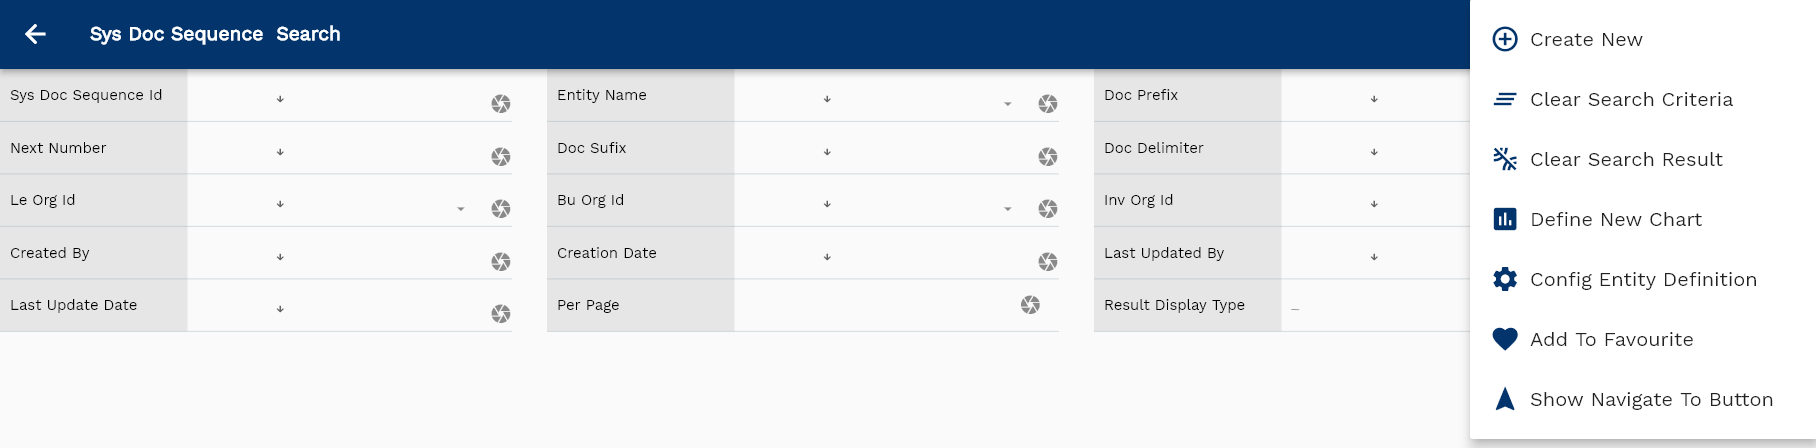
To view/create/update a document sequence, navigate to the "document sequence" search screen from your dashboard/favorite.
Enter the entity name/document sequence details or any other criteria in the search form and click on the search button to view an existing document sequence.
Click on create a new button to create a new document sequence; by manually entering all the information,
Copying an existing document sequence to a new document sequence is always better than manually entering all the data to create a new document sequence.
If you don't enter document sequence details, the system will show you all the document sequences. If your organization has configured to make any field mandatory for search, then you have to enter those fields to search document sequences.
The application will fetch all the server data and take you to the search result screen. The search result screen looks a bit different on desktop and mobile devices.
To view the search result in a table format, click on the table icon available in the bottom left corner.
To open a specific document sequence, click on the menu of that record, and click on view/fetch & view.
You can also click on the expand icon against any item on the search result screen to view the document sequence details such as business unit name, payment term, price list, etc.
The system will fetch all the data related to the selected document sequence. The document sequence details are shown either right on the search result screen or on a separate screen, depending on the device size.
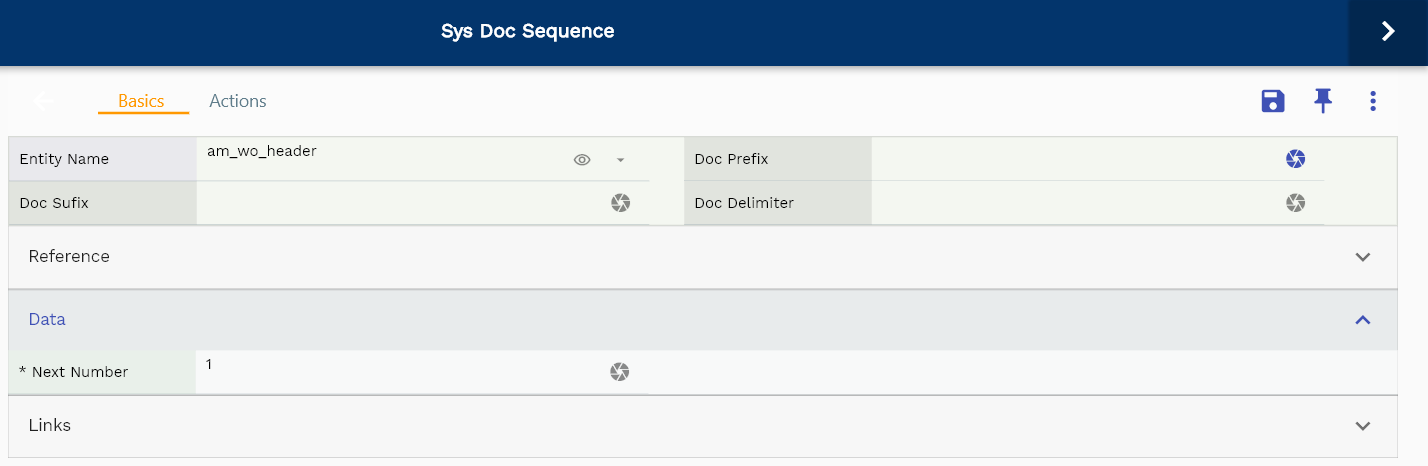
Scroll left, right, up, and down to view all the details. The document sequence line and details are shown in a separate tab. The default configuration shows fields in various functional groups, such as
- Reference
- Data
You can configure the application to show which fields should be shown under which group. You can also create new groups as per your business requirements.
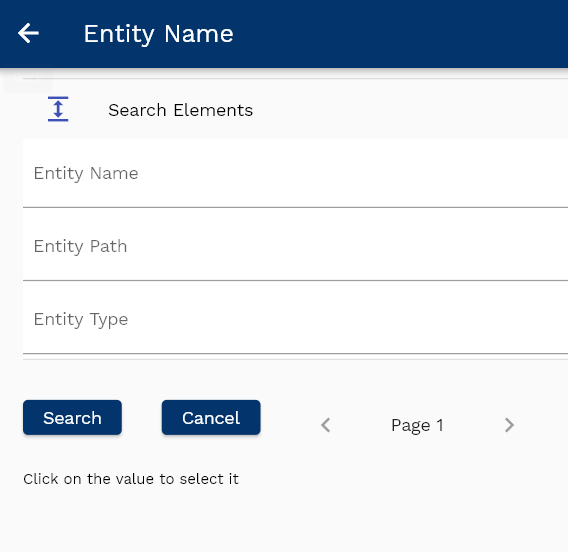
While creating a new document sequence, you can click on the select icon on the entity name field to search and select an entity name.
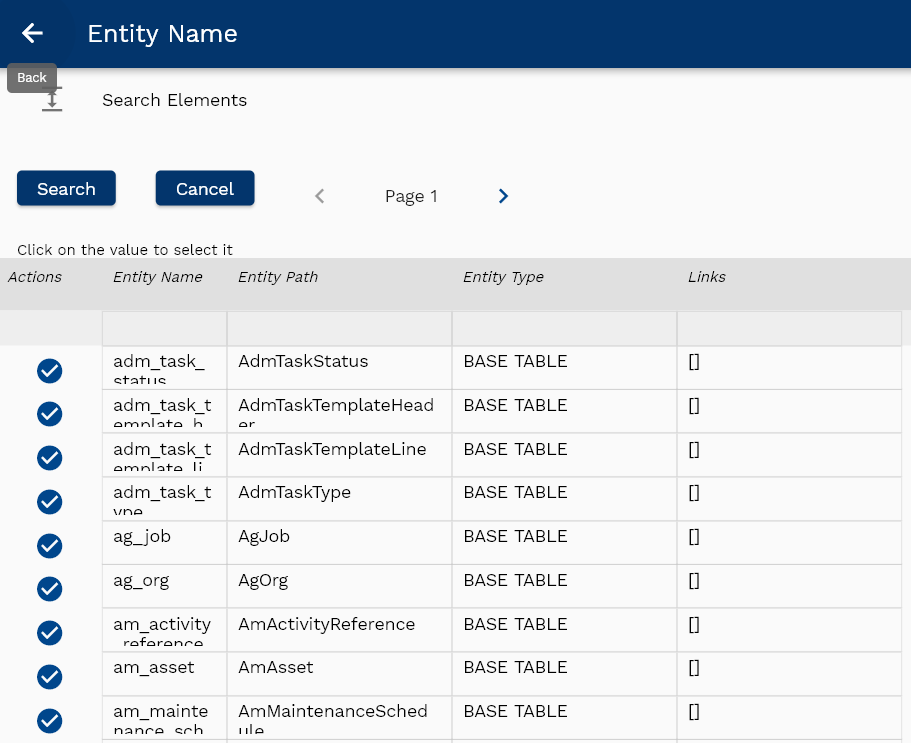
Click on the search button to search available entity names. Click on the select action buttons to select the entity.
All Fields
| Name | Sequence | Label | InputType | Field Group |
|---|---|---|---|---|
| 10 | sysDocSequenceId | Sys Doc Sequence Id | InputType.number | REFERENCE |
| 10 | entityName | Entity Name | deferredSelect | DEFAULT |
| 20 | docPrefix | Doc Prefix | InputType.textField | DEFAULT |
| 30 | nextNumber | Next Number | InputType.number | DATA |
| 40 | docSufix | Doc Sufix | InputType.textField | DEFAULT |
| 50 | docDelimiter | Doc Delimiter | InputType.textField | DEFAULT |
| 60 | leOrgId | Le Org Id | deferredSelect | REFERENCE |
| 70 | buOrgId | Bu Org Id | deferredSelect | REFERENCE |
| 80 | invOrgId | Inv Org Id | deferredSelect | REFERENCE |
| 5090 | createdBy | Created By | InputType.textField | REFERENCE |
| 5100 | creationDate | Creation Date | InputType.dateTime | REFERENCE |
| 5110 | lastUpdatedBy | Last Updated By | InputType.textField | REFERENCE |
| 5120 | lastUpdateDate | Last Update Date | InputType.dateTime | REFERENCE |