POS Terminal
This documentation is incomplete.
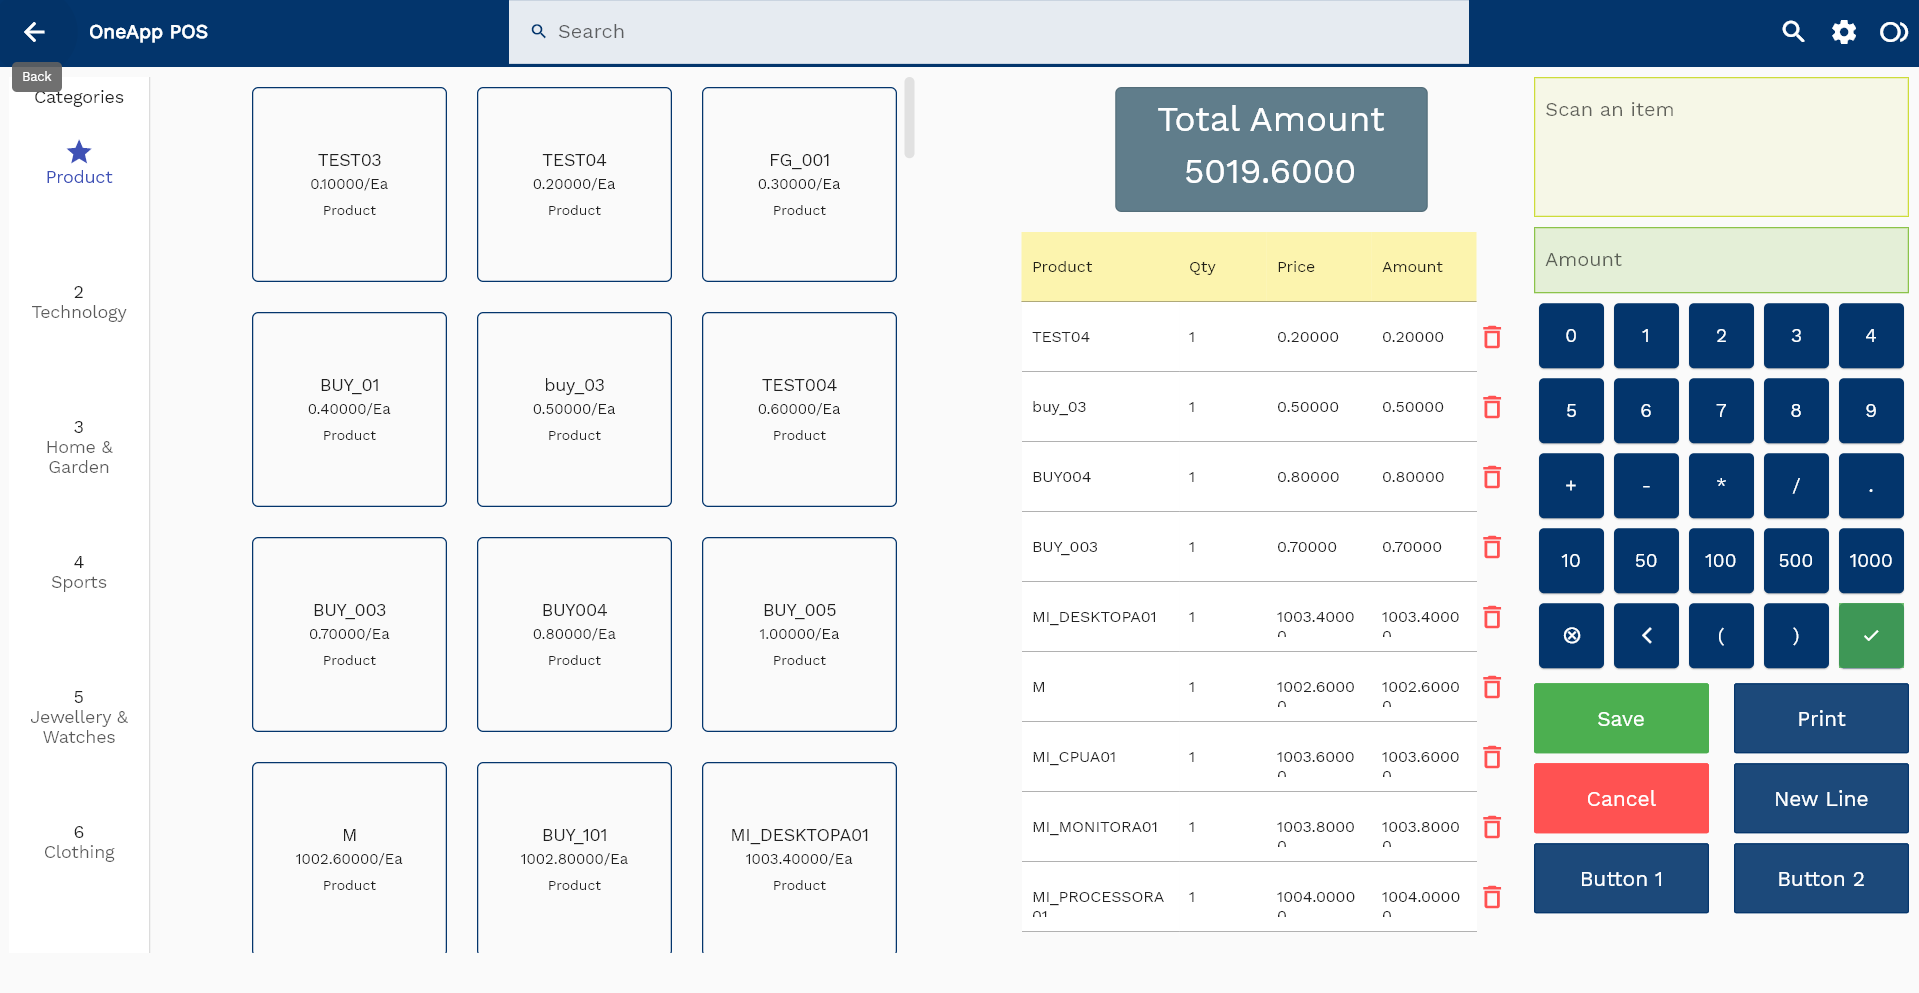
POS terminal is a point of sale system that allows you to sell products to customers with minimal interaction in recording a sale. The POS terminal is a simple, easy-to-use interface that can be configured/customized to your business needs.
The POS terminal is designed to work with both online and offline modes. In the online mode, the POS terminal communicates with the ERP database. It allows you to sync your POS product and order data with the main ERP when the internet is available. In the offline mode, the POS terminal uses a local database. The offline mode is useful when you are not connected to the internet.
The POS terminal does not need traditional proprietary hardware. You can use the POS screen with any computer or mobile device with windows, android, or iOS/macOS operating system. You can also run it on any computer with a web browser.
The offline local database contains all the information about products, stores, and terminals required to create a POS order. This approach allows you to operate POS in any simple hardware device without requiring several database connections to the central ERP system.
You can add products to the POS shopping cart in several ways:
- Scanning a barcode of a product.
- Searching a product by name in the search field.
- Navigating to the product category list and selecting a product.
- Manually add a product to the shopping cart.
- Reading the product information from an RFID reader.
Categories
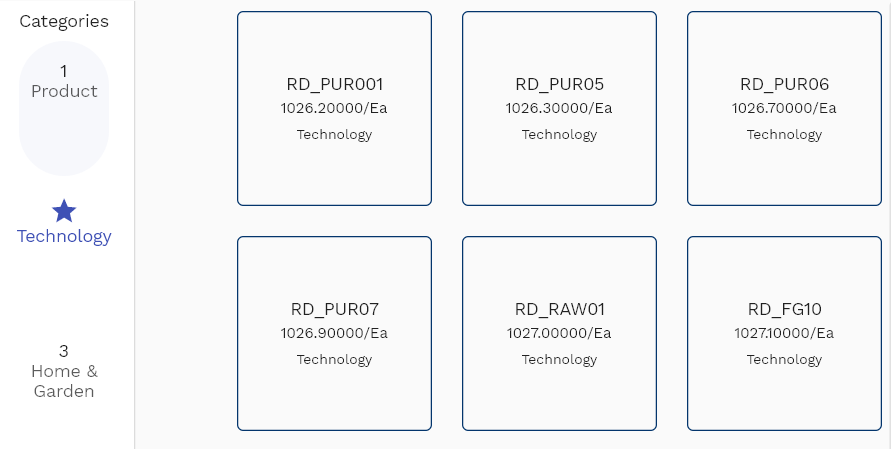
The left panel of the POS screen contains categories and products. You can view all the categories and products by clicking on the category name.
Categories are used to group products. You can create a new category by navigating the "category" search screen from the dashboard/favorite.
The system allows you to assign multiple categories to a product. If multiple categories are assigned to a product, the same product will appear in all the assigned categories on the POS screen.
To view the products in a category, click on the category name. The products in the category are displayed in the right panel next to the category list.
To add a product to the shopping cart, click on the product name. The product will be added to the shopping cart. The application adds only one quantity of a product to the shopping cart. The application also updates the total amount of the shopping cart.
The default configuration of the POS terminal is configured to show product name, price, the unit of measure, and product category.
Search
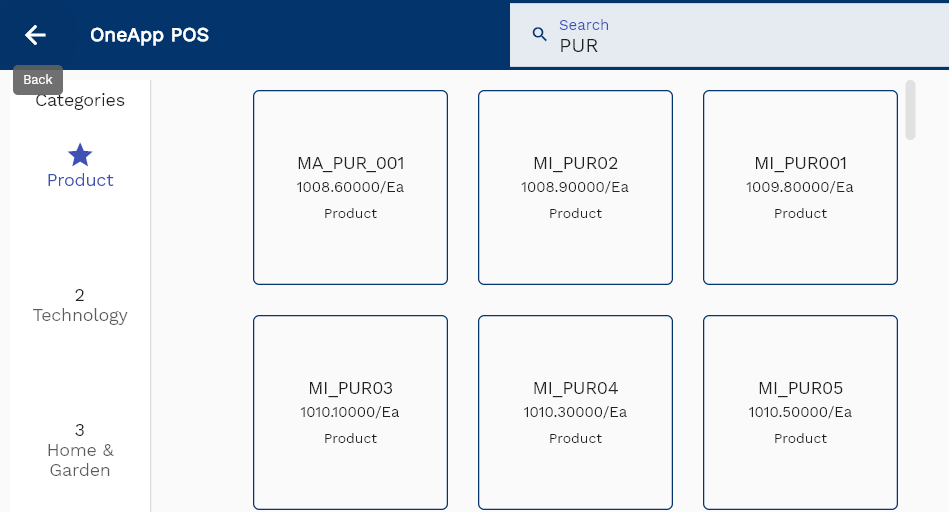
The search button at the top of the POS screen allows you to search products by name, description, or category. The search results are displayed in the right panel next to the category list.
The search results are updated as you type in the search field. To clear the search field, either click on the "clear" button or delete all the characters in the search field.
To add a product to the shopping cart, click on the product name in the search result panel. The product will be added to the shopping cart. The application adds only one quantity of a product to the shopping cart. The application also updates the total amount of the shopping cart.
Scan
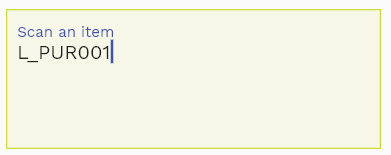
You can scan a product's barcode to add it to the shopping cart. The barcode must result in a single valid product.
- If the barcode does not result in a valid product, the application will display an error message.
- The application will add the first valid product to the shopping cart if the barcode results in multiple valid products.
The barcode scan results are the same as manually adding a product to the shopping cart. i.e., the application adds only one quantity of a product to the shopping cart, and the application updates the total amount of the shopping cart.
Receipt
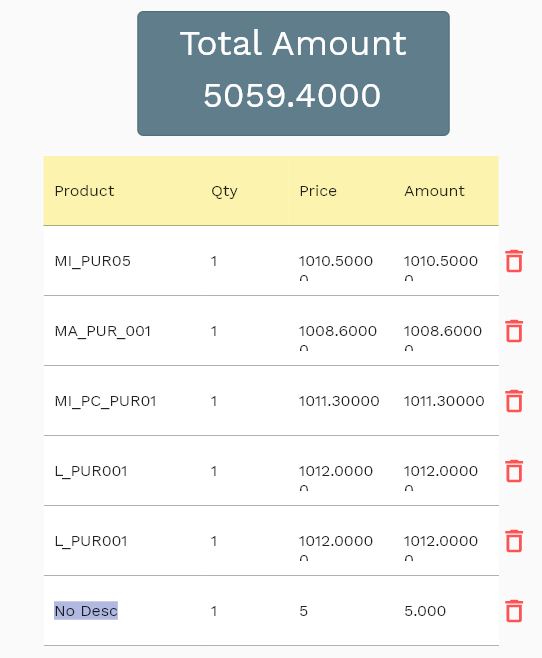
The receipt section displays the shopping cart contents and the total amount of the shopping cart. If you click the "print" button, the shopping cart contents will be printed to the attached printer.
The receipt section allows you to
- Change the quantity of a product in the shopping cart.
- Remove a product from the shopping cart.
- Change the unit price of a product in the shopping cart.
- Change the total amount of any product in the shopping cart.
The application updates the line amount and total amount of the shopping cart if you change the quantity or unit price of a product in the shopping cart.
Similarly, when you change the total line amount of a product in the shopping cart, the application updates the line amount and total amount of the shopping cart.
When you are done with the shopping cart, click on the "save" button. The application will create a POS order and clears the shopping card to add a new order.
Cash Calculator
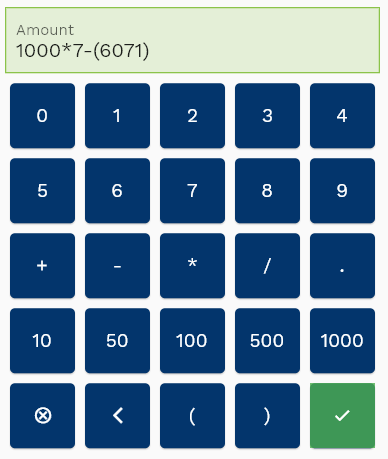
The cash calculator allows you to compute simple cash transactions. You can enter the total cash paid by the customer, and the application will calculate the amount to be returned to the customer.
You can enter the total cash the customer paid by either typing in the amount in the cash field or using the cash 10, 50, 100, 500, and 1000 buttons.
Below is the list of all cash calculator buttons and their functionalities :
- 0 - 9: Adds the corresponding amount to the cash field.
- (.): Adds the decimal point to the cash field.
- (+) : Adds 2 numbers in the cash field.
- (-): Subtracts two cash fields.
- (*): Multiplies two numbers in the cash field.
- (/) : Divides 2 numbers in the cash field.
- clear(with x icon) : Clears the cash field.
- left(with <) : Clears one digit to the left.
- left(: Adds a left bracket to the cash field.
- right): Adds a right bracket to the cash field.
- =(with tick icon): Calculates the result of the calculation in the cash field.
Button
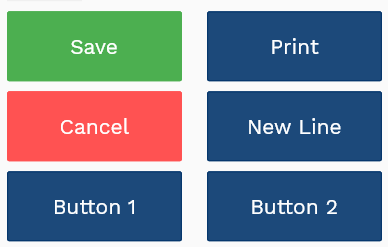
The button section provides you with a list of buttons that you can use to perform various actions to complete/cancel the current shopping cart.
The button section contains the following buttons:
- Save: Saves the current shopping cart and creates a POS order. The button also clears the shopping cart to add a new order.
- Print: Prints the current shopping cart. The print button does not clear the shopping cart.
- Cancel: Cancels the current shopping cart. The button also clears the shopping cart to add a new order.
- New Line: Adds a new line to the shopping cart. You can add a new line to the shopping cart to add a product to the shopping cart that is not available in the product master list.
The application also provides two unused buttons that you can configure to perform any other action per your business requirements.